
Luxe Living
Case Study: Rowville Reno - Living & Alfresco
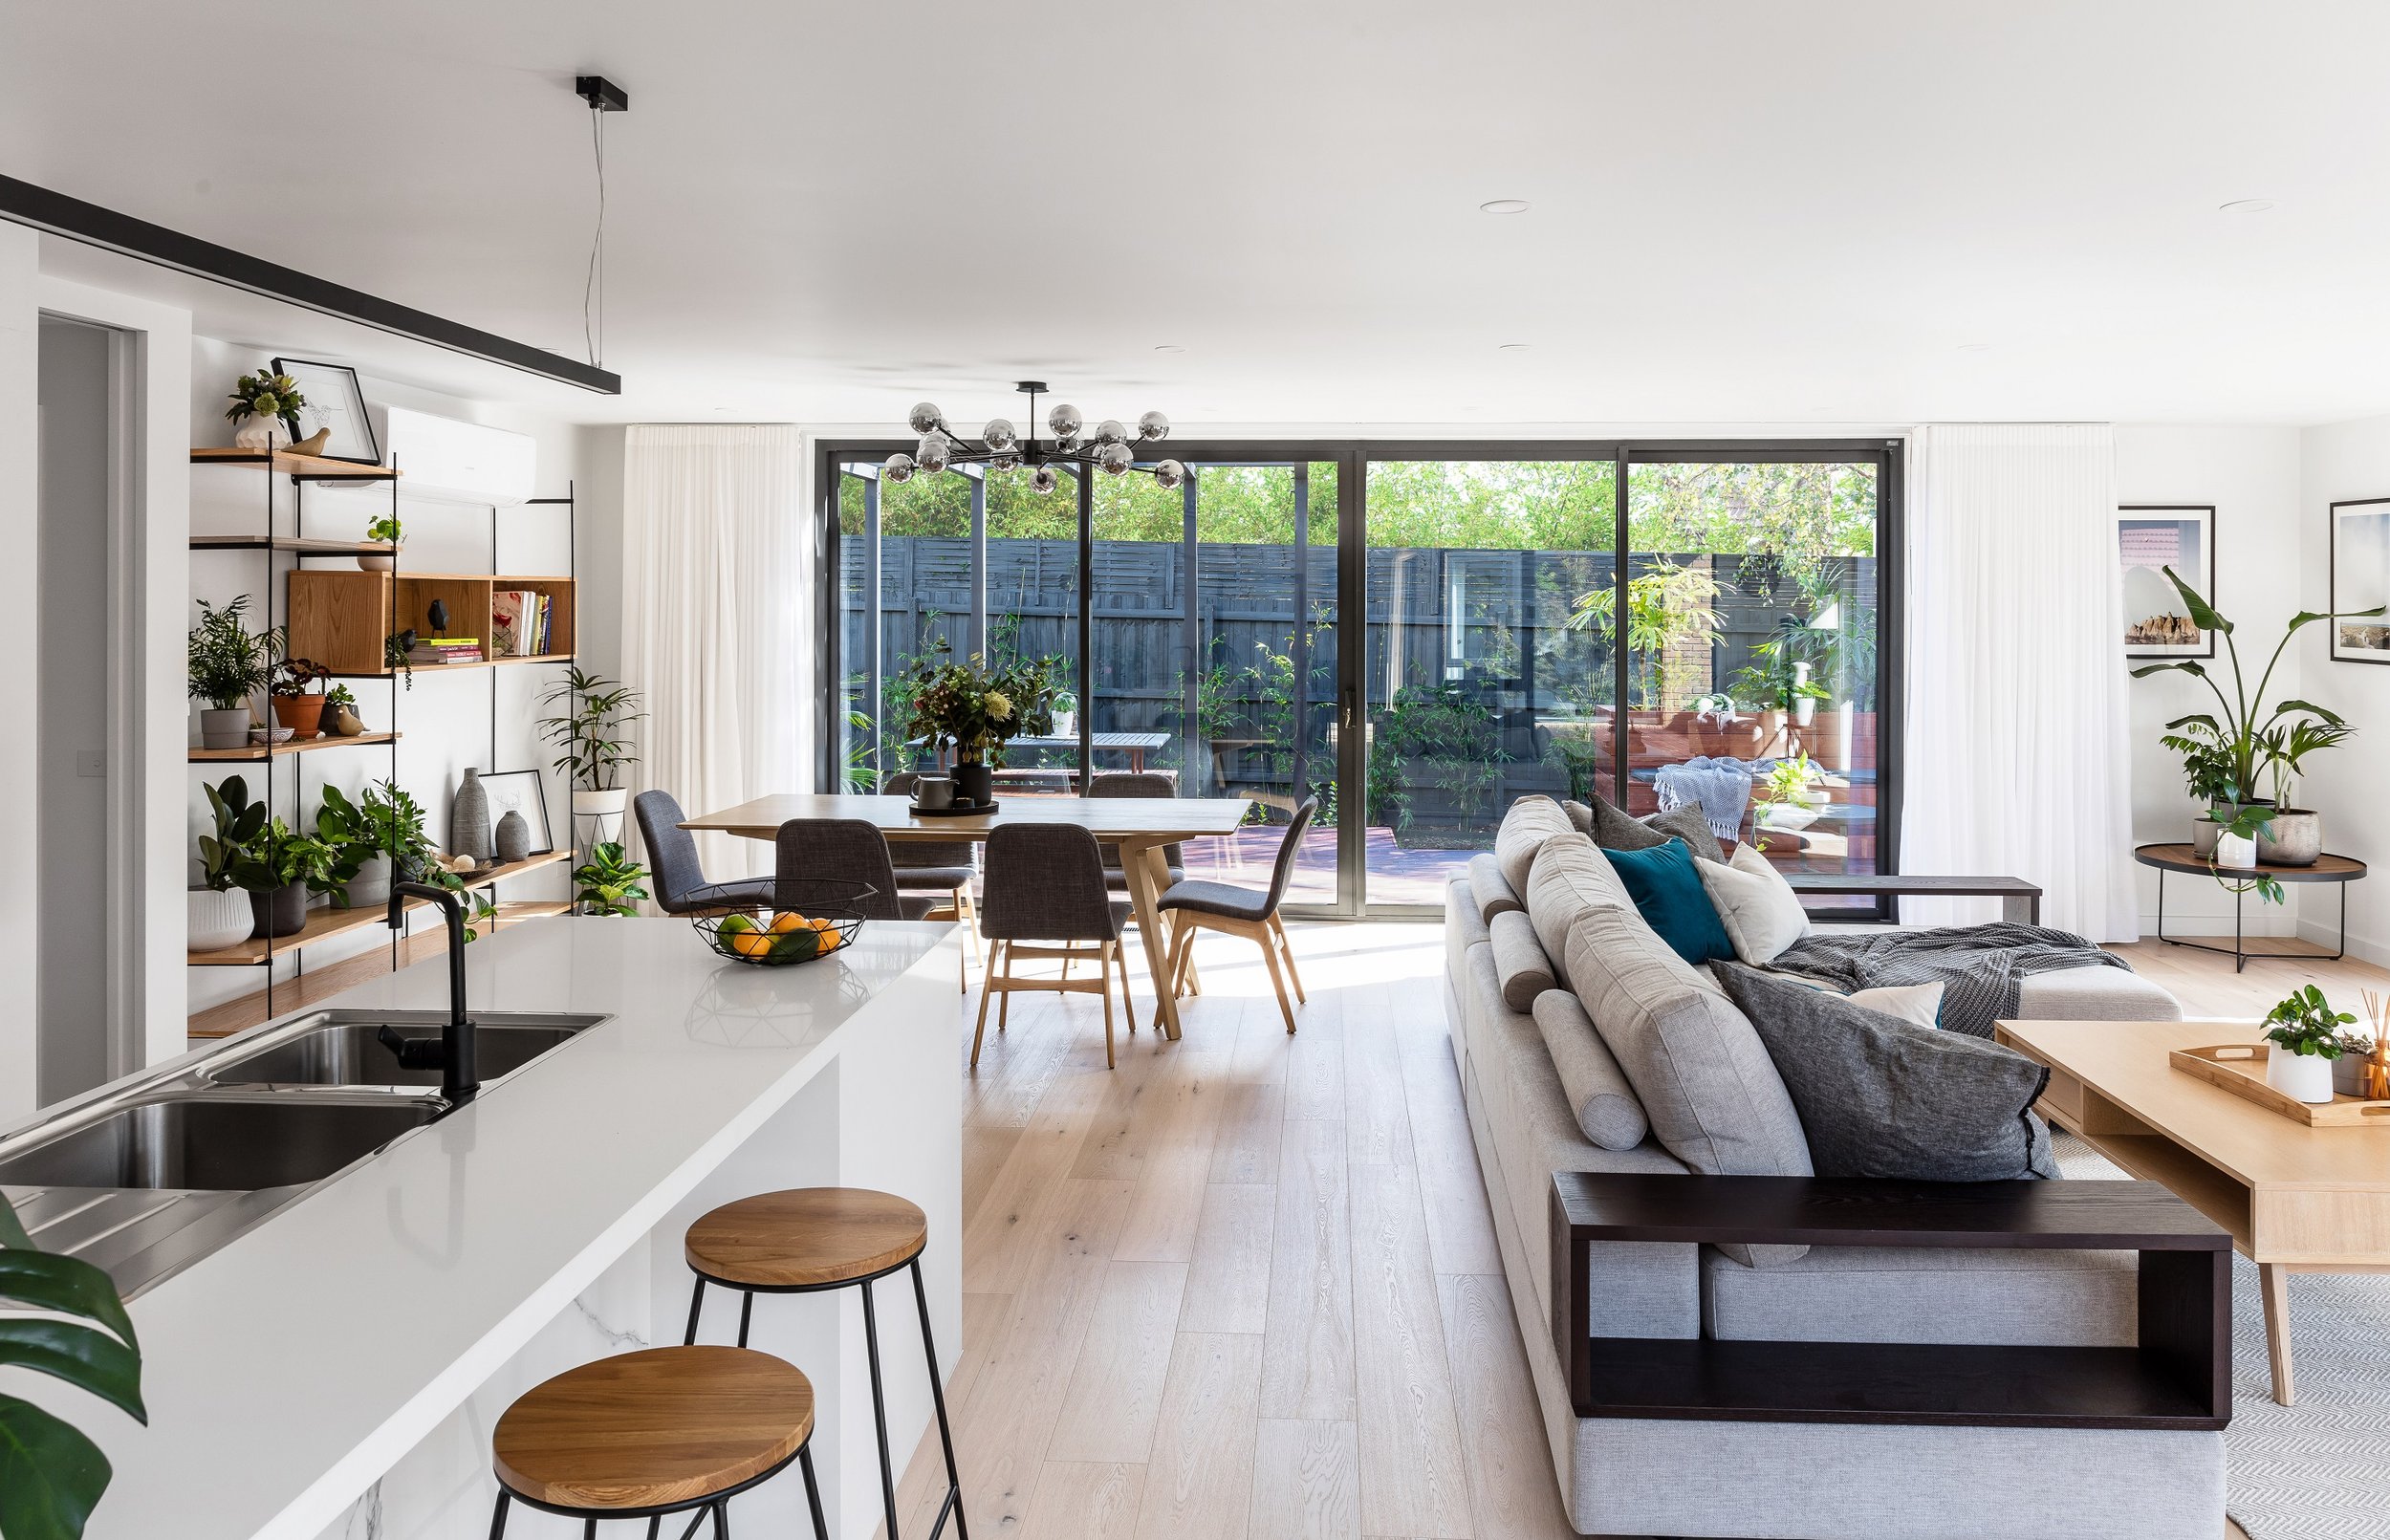
Open plan living. It’s hated by some and loved by others. But it was exactly what this renovation needed to give a sense of space, light and unity.
The old living / meals area was the most dysfunctional part of the house, it was dark, cramped & access to the north facing backyard was completely blocked off by 2 bedrooms. The house had too many unused rooms & needed some modernizing!
Our aim was to create a large open planned space which combined the kitchen, dining, lounge & deck, an area spacious enough for entertaining friends & family but would also feel cozy & intimate for a few.
We wanted the space to be light, bright, modern, comfortable & have convenient access to the lovely sun-drenched back garden.

Pre reno - Existing dining looking towards rear bedrooms
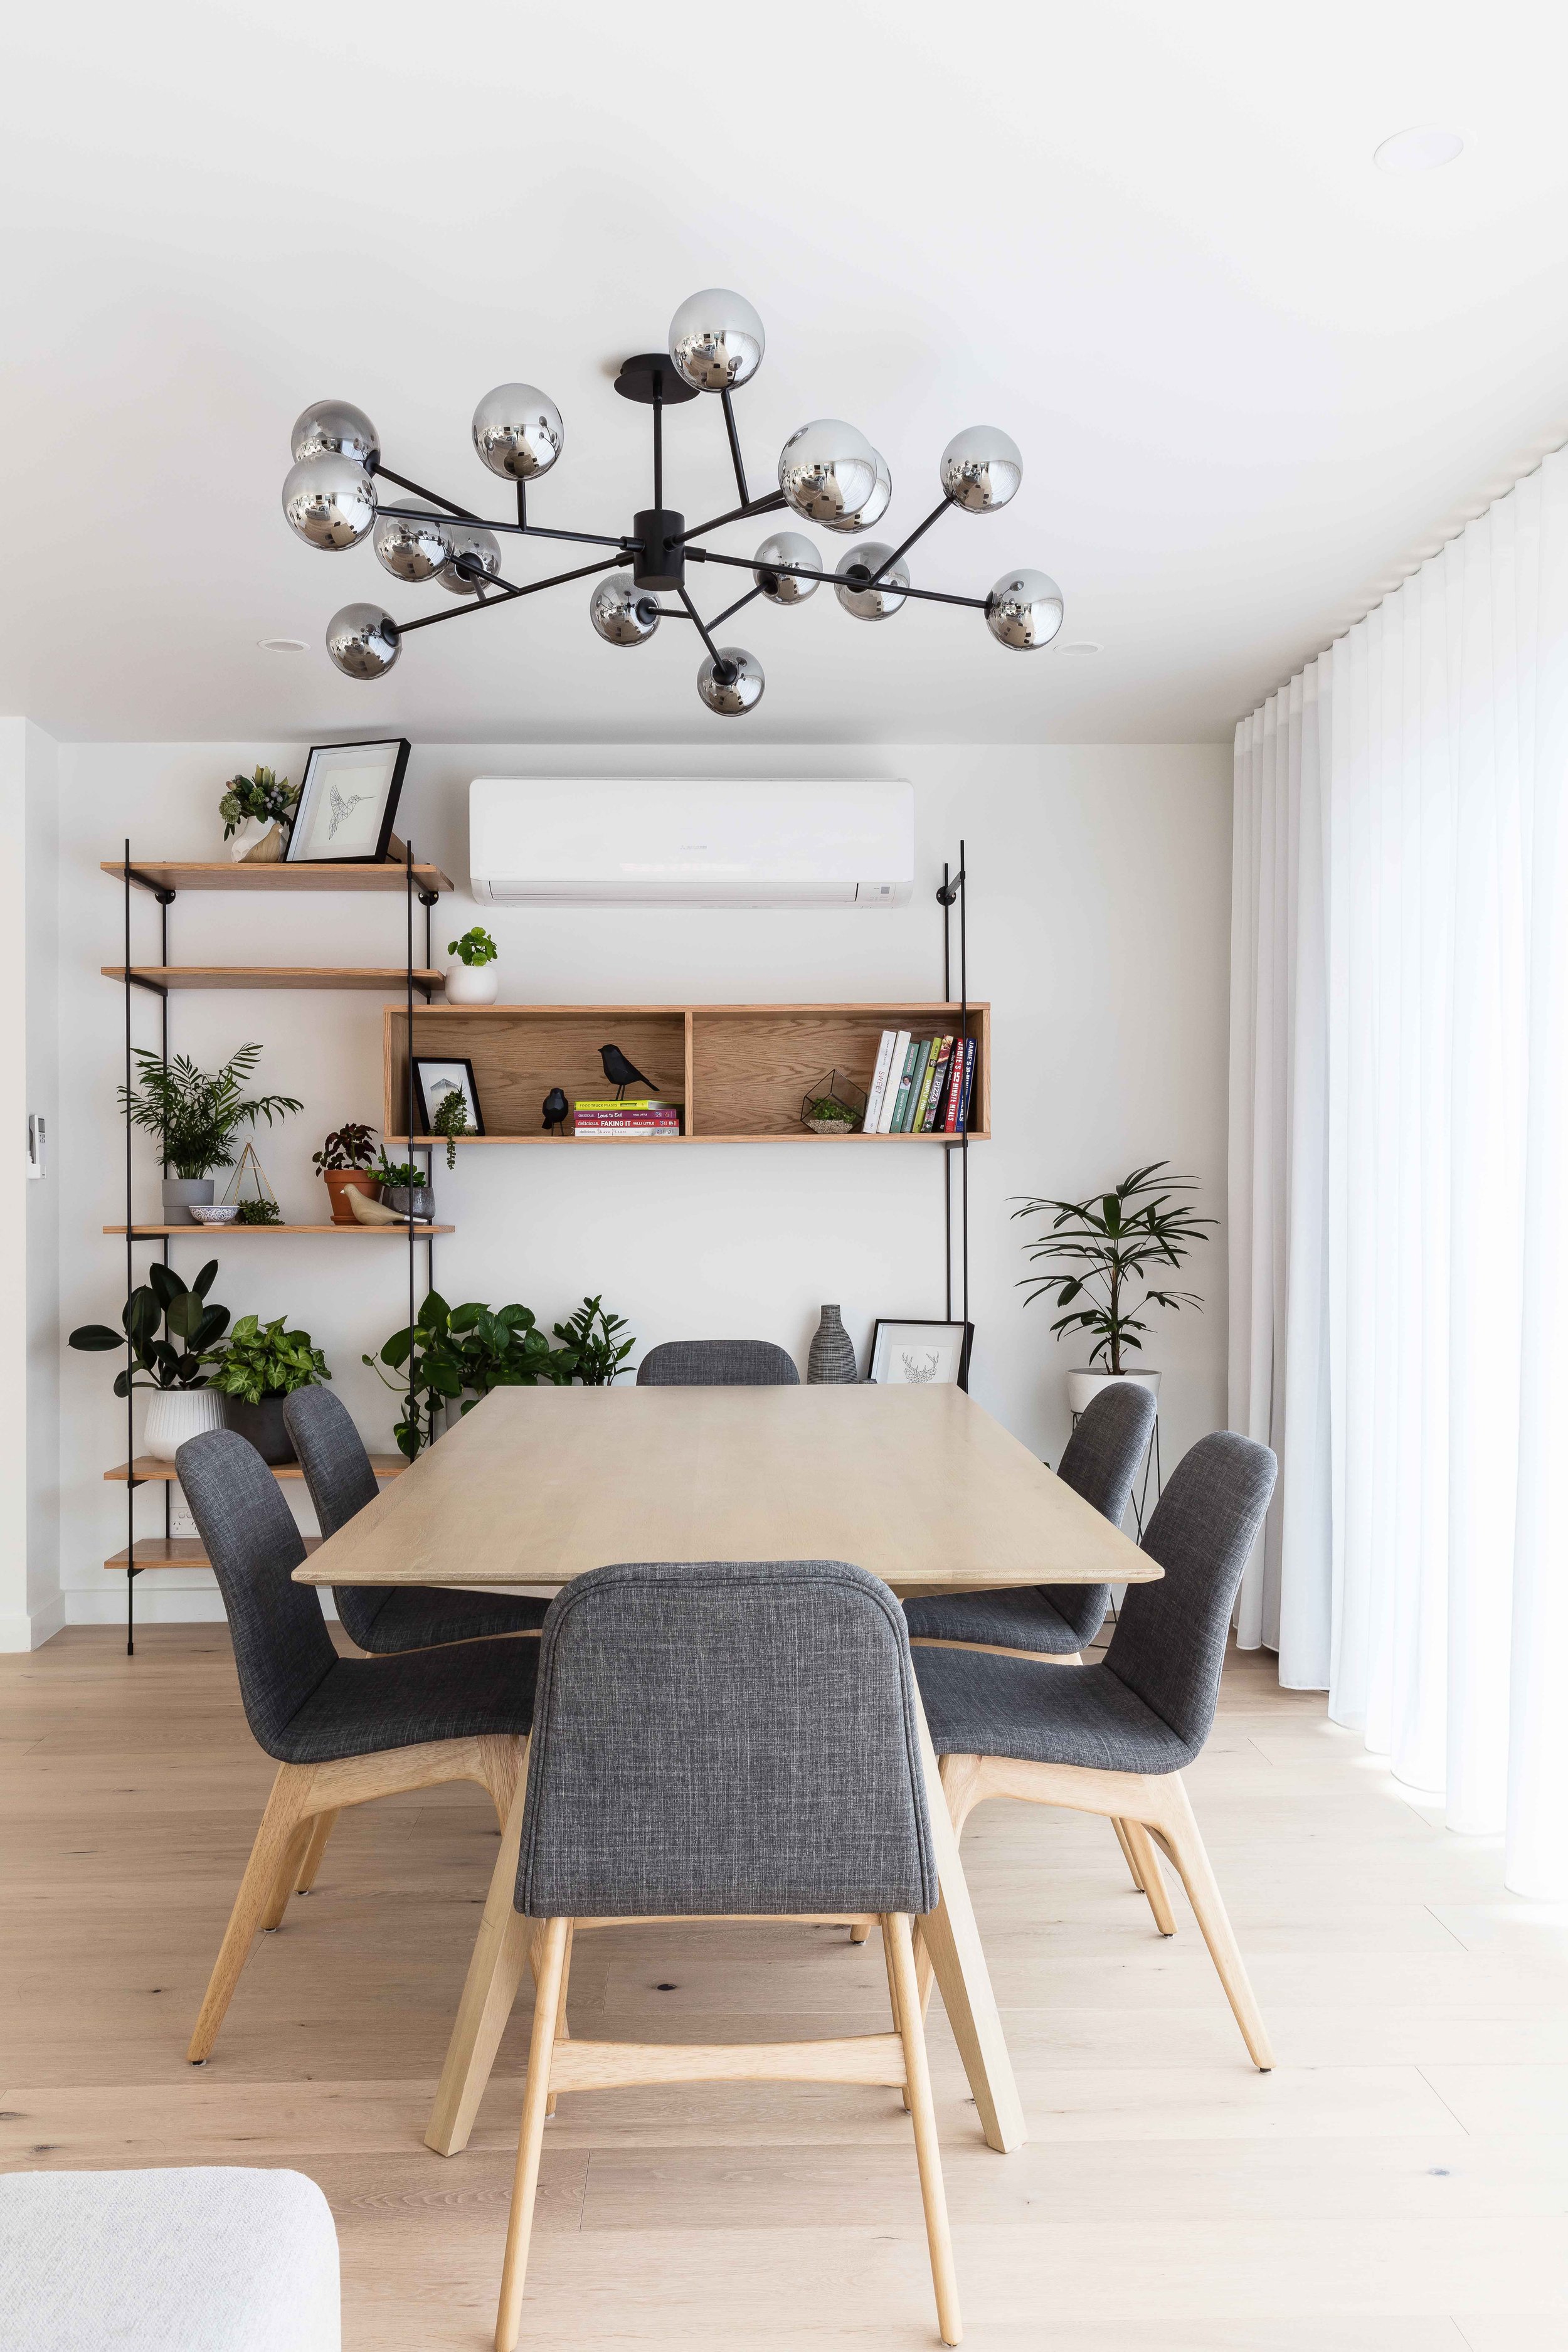
Post reno - Opening living area looking towards the space where the bedrooms once were

Pre Reno - Existing living / dining room with views to internal courtyard to the left
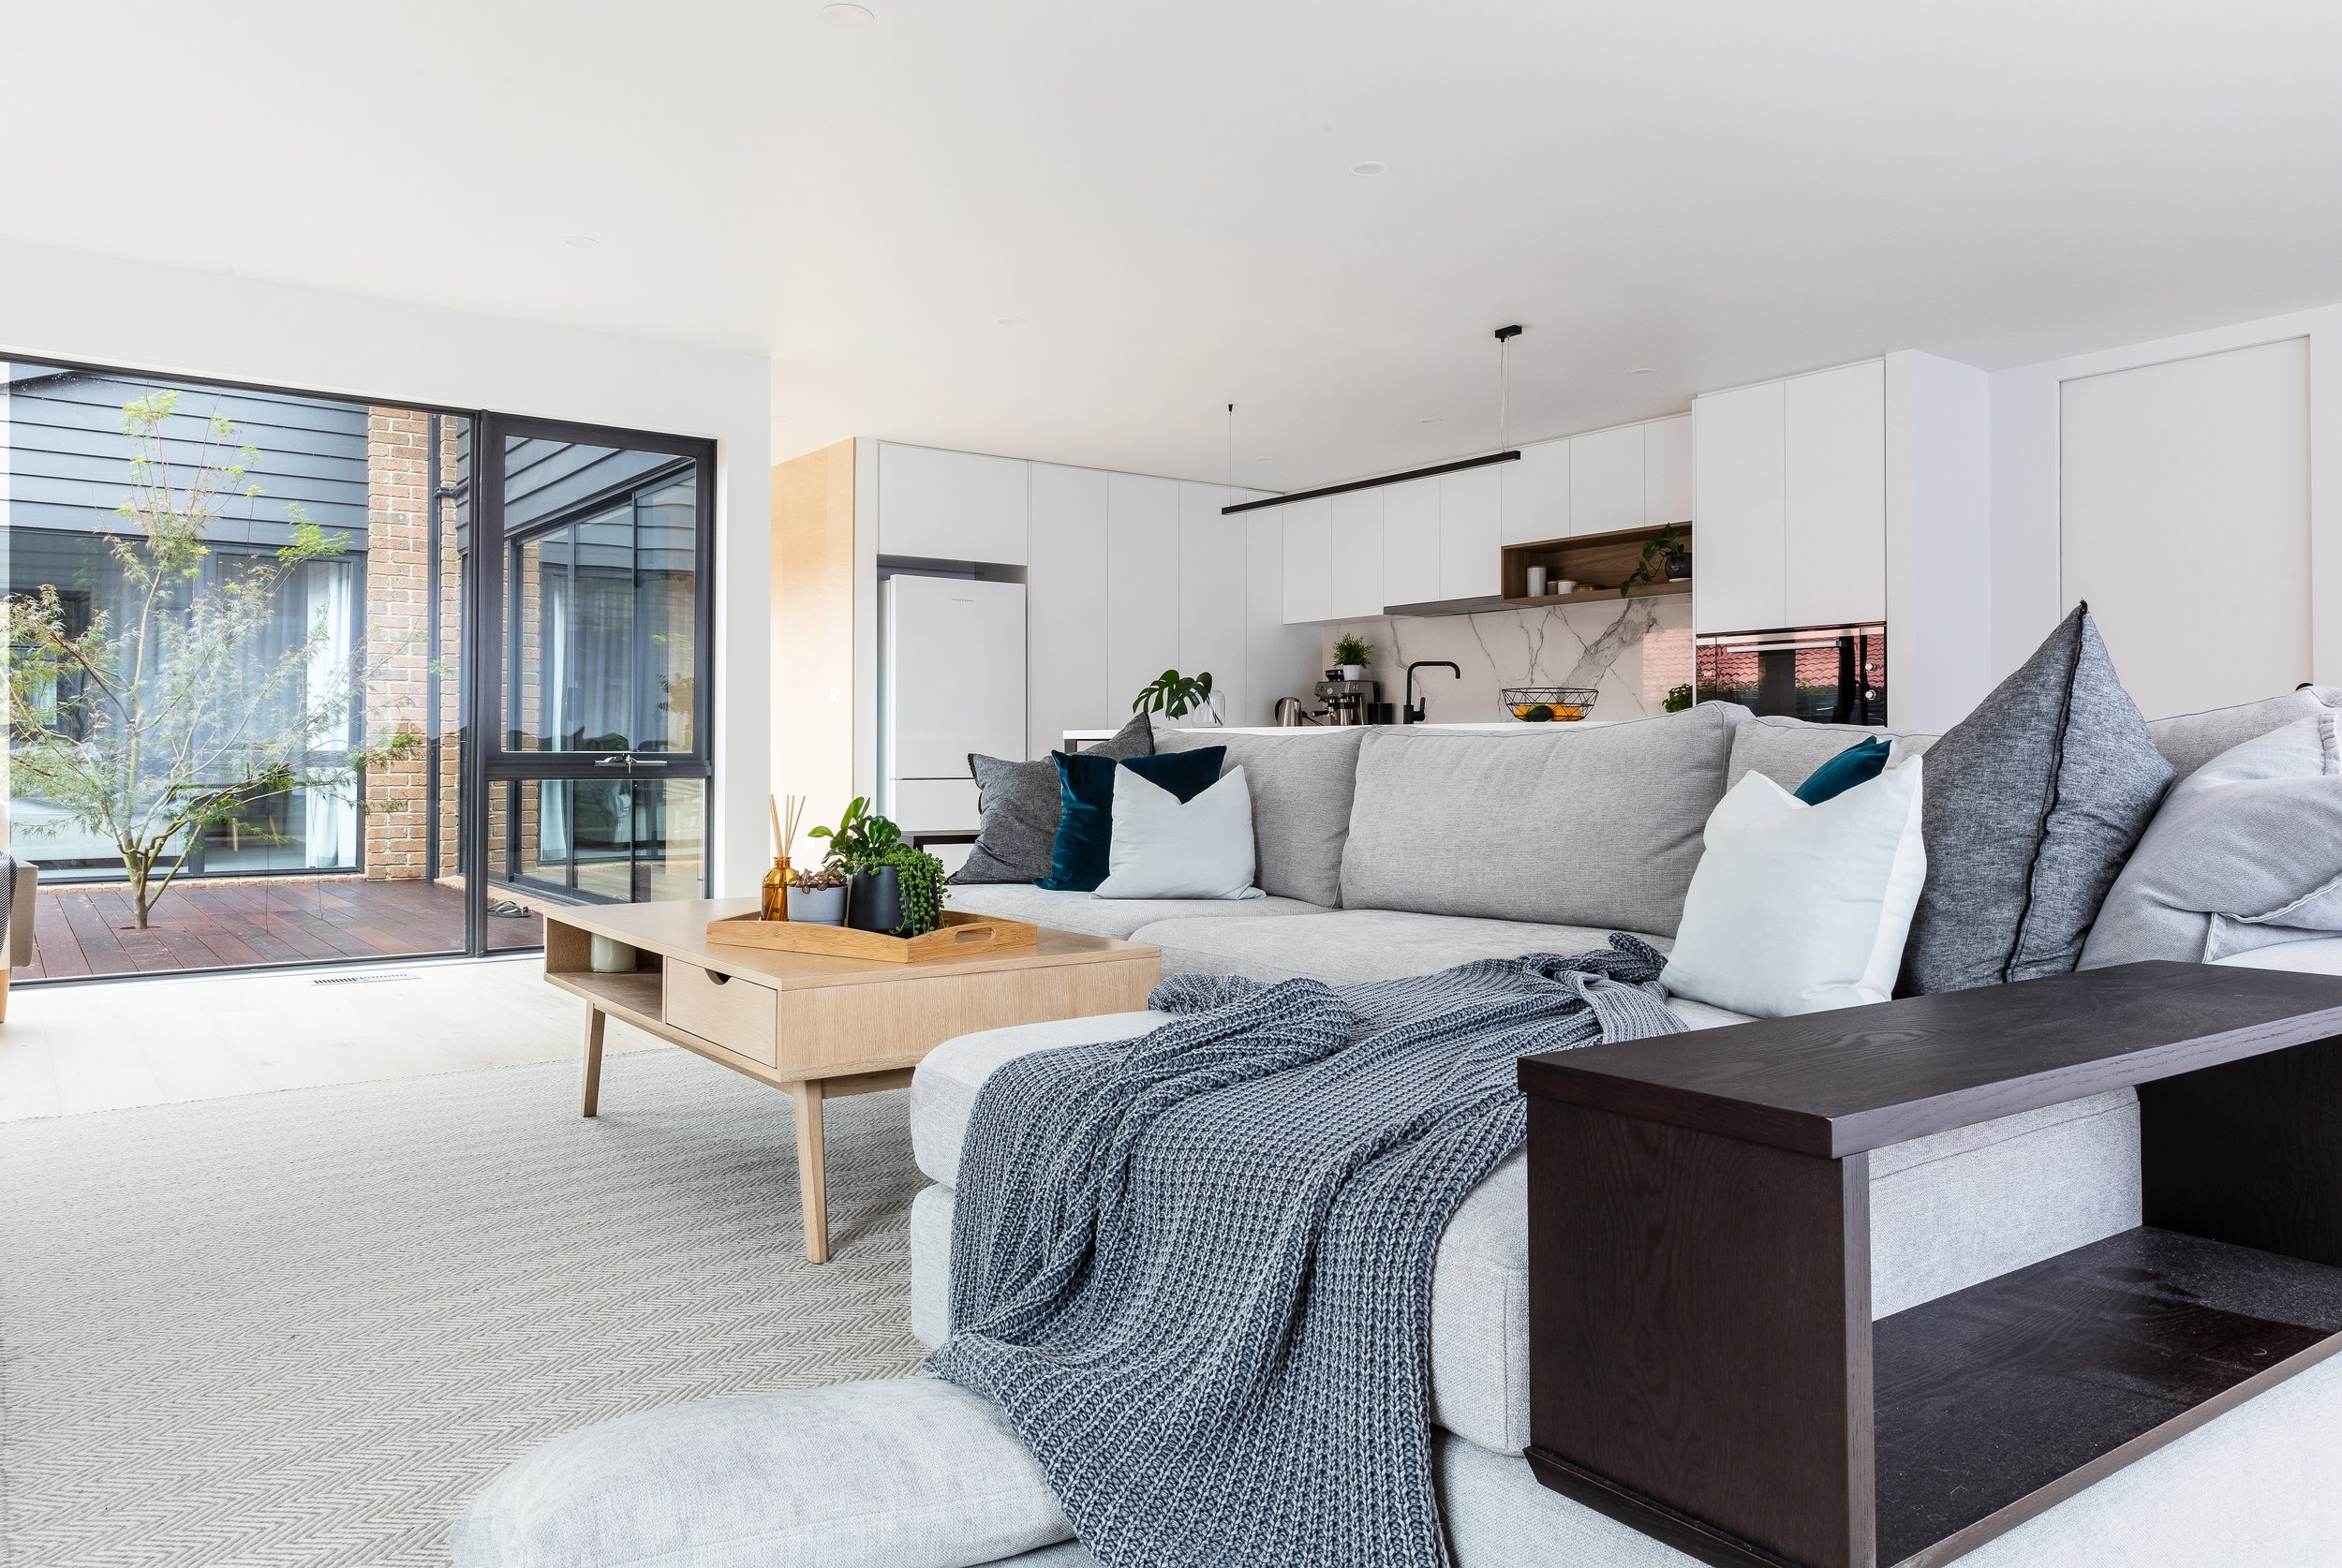
Post Reno - Open plan living area with views to internal courtyard to the left

Pre Reno - Existing Courtyard deck
Post Reno - Courtyard deck & hallway

Pre Reno - Existing rear face of house

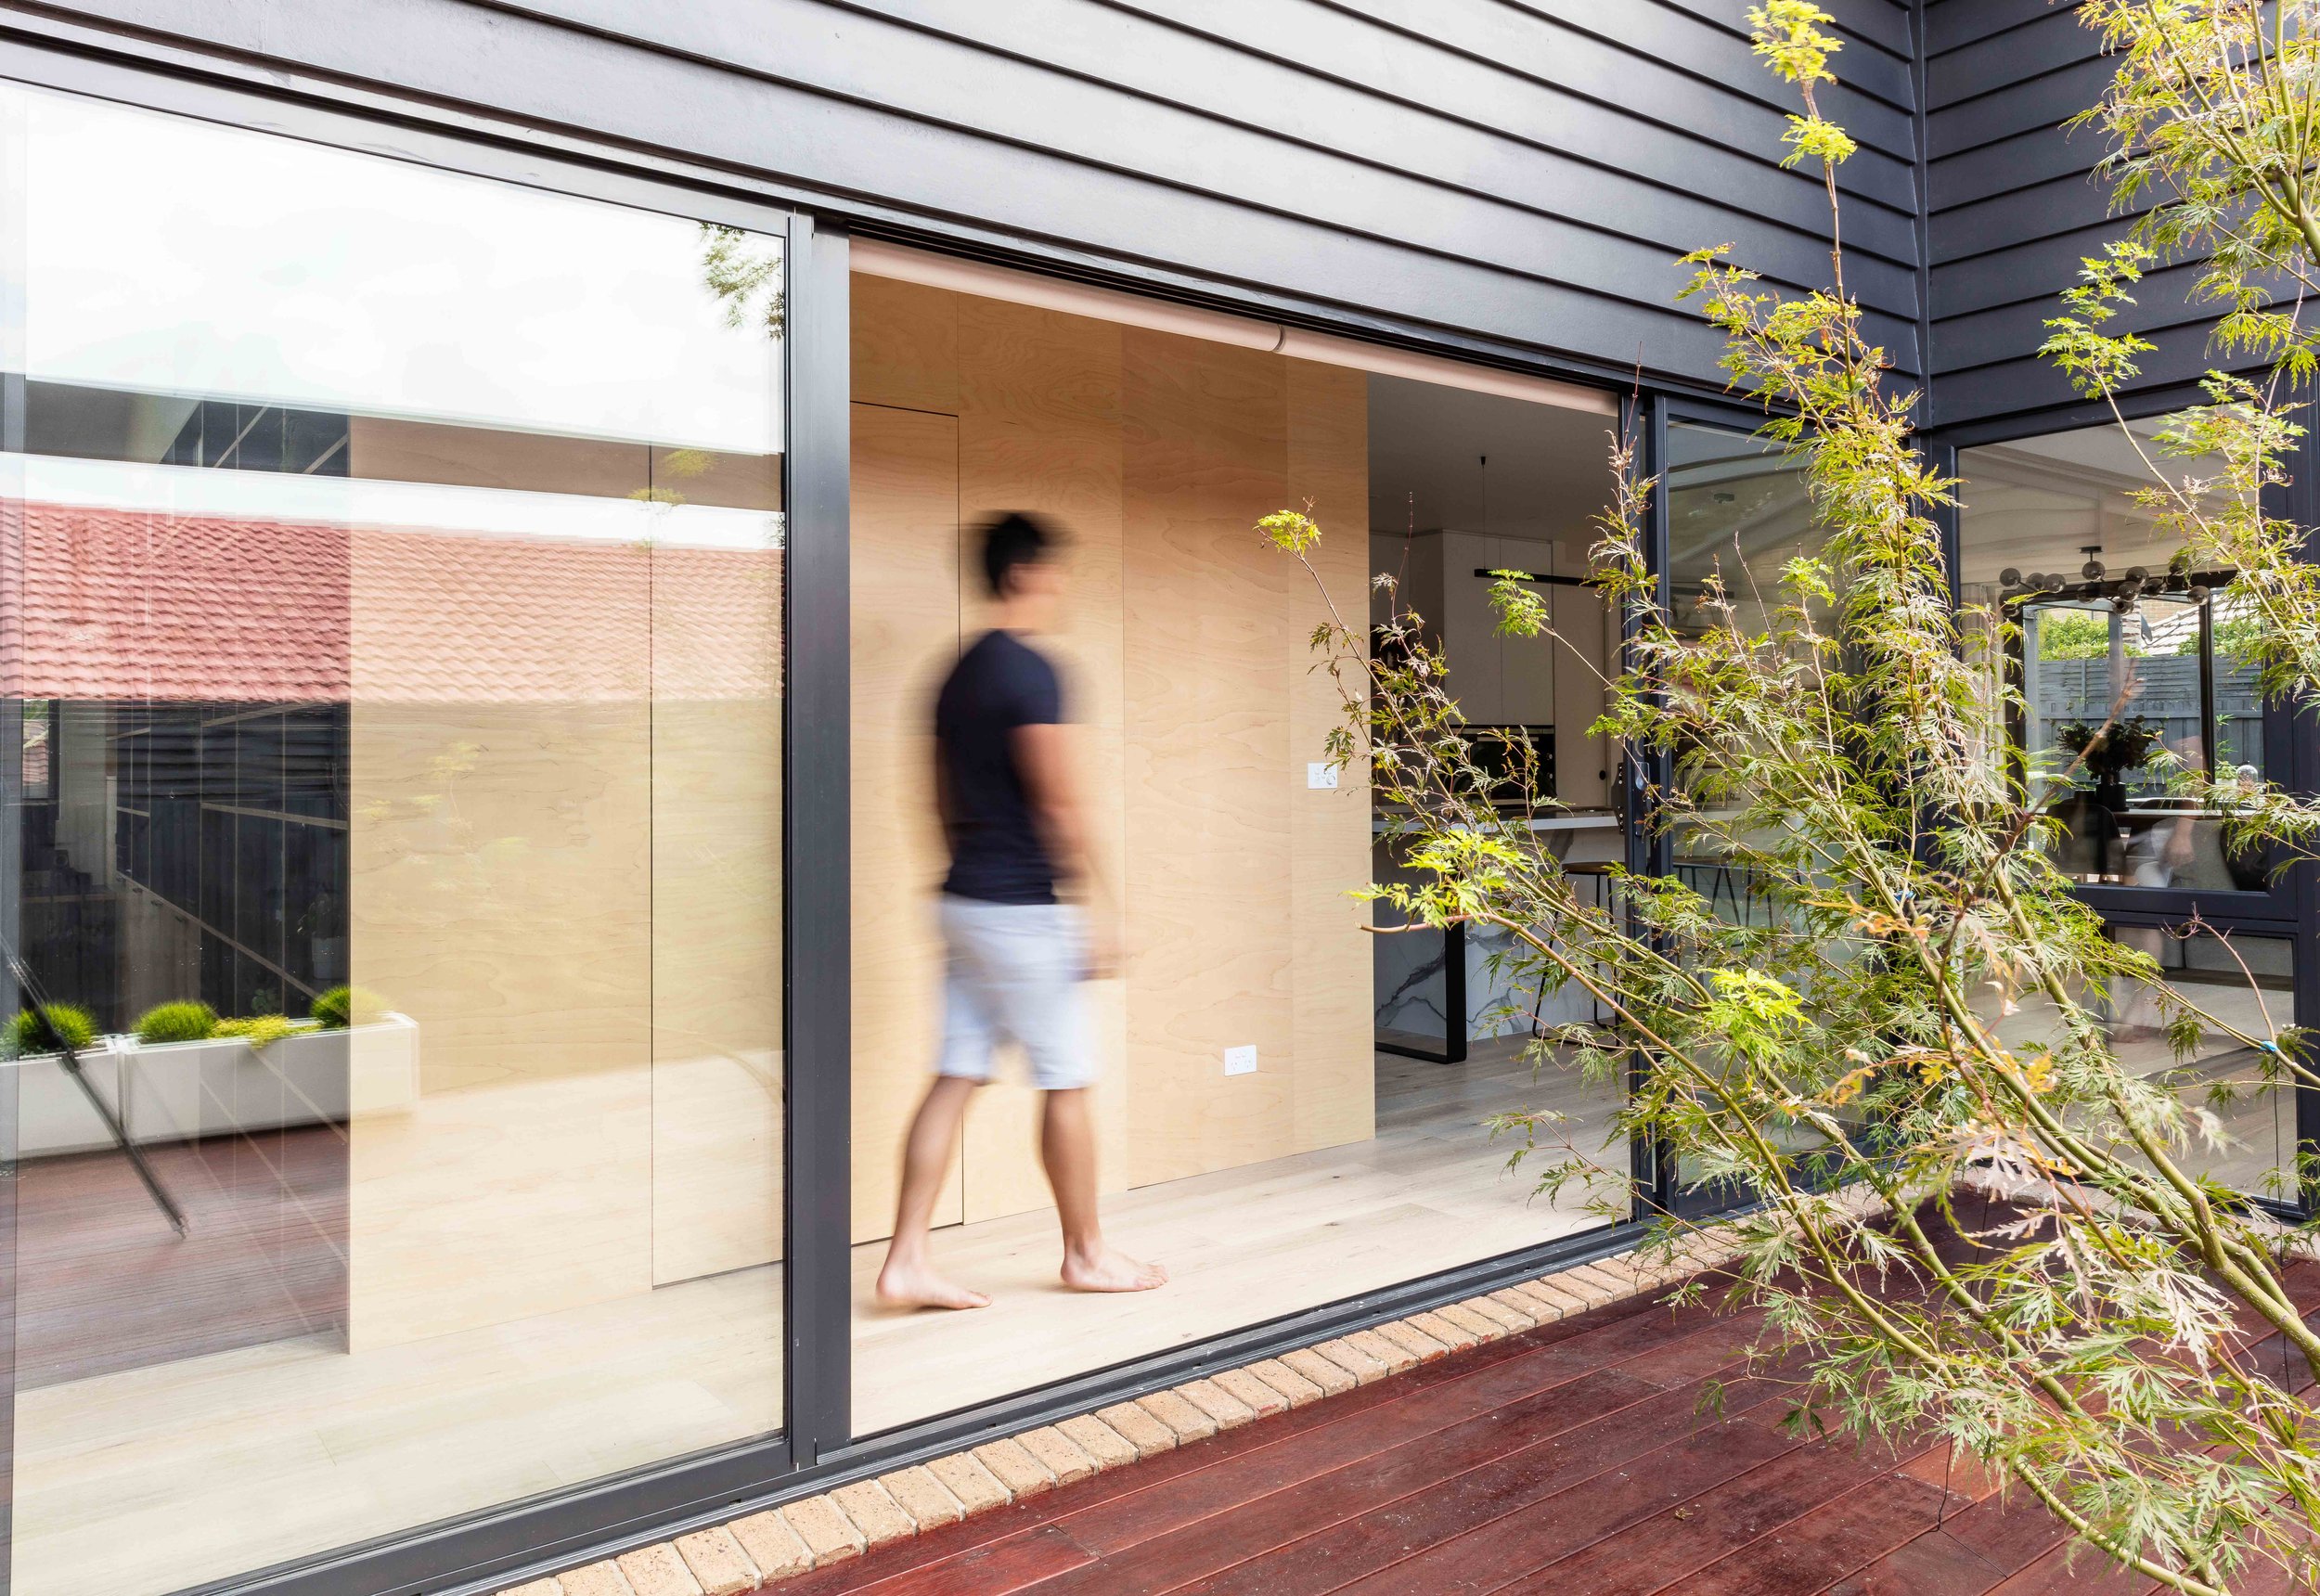
Post Reno - Rear face of the house with new sliders & alfresco decking


CLICK BELOW TO OUR ROOM BY ROOM POSTS FOR BEFORE & AFTER SHOTS
Layout
The concept was to divide the house into two main spaces; work & play, a tranquil, private family space to the rear & the home office to the front. The areas would be separated by a narrow passageway & courtyard. A decidous tree planted in the raised courtyard decking, once matured, would provide shade in the warmer months and allow the penetration of winter light in the cooler months.
Our approach to expanding the open living space was simple, it involved removing the two rear bedrooms & providing access to the backyard by replacing the bedroom windows with a commercial sized sliding door. To make up for the lost bedrooms, we converted the old formal dining room into a guest bedroom by closing off the family room wall & adding a walk-in-robe.
To provide access from the open living area to the backyard, we connected the spaces with a timber deck that led down onto a grassed area. The design for the decking was to have two clearly separate seating areas, one with an outdoor dining space & the other to have a corner nook with built-in raised timber planter beds & bench seating intended for casual drinks or an afternoon cuppa. An open pergola with closely spaced timber slats above the sliding door provide shade from high summer sun and the planting of deciduous vines to the vertical posts help with this while ensuring penetration of winter light.

Pre Reno - Existing plan of living area & bedrooms

Post Reno - plan of open plan living area & alfresco
Design, Finishes & Specifications
Our brief for the design of the living & dining room was based largely on a minimal, modern scheme.
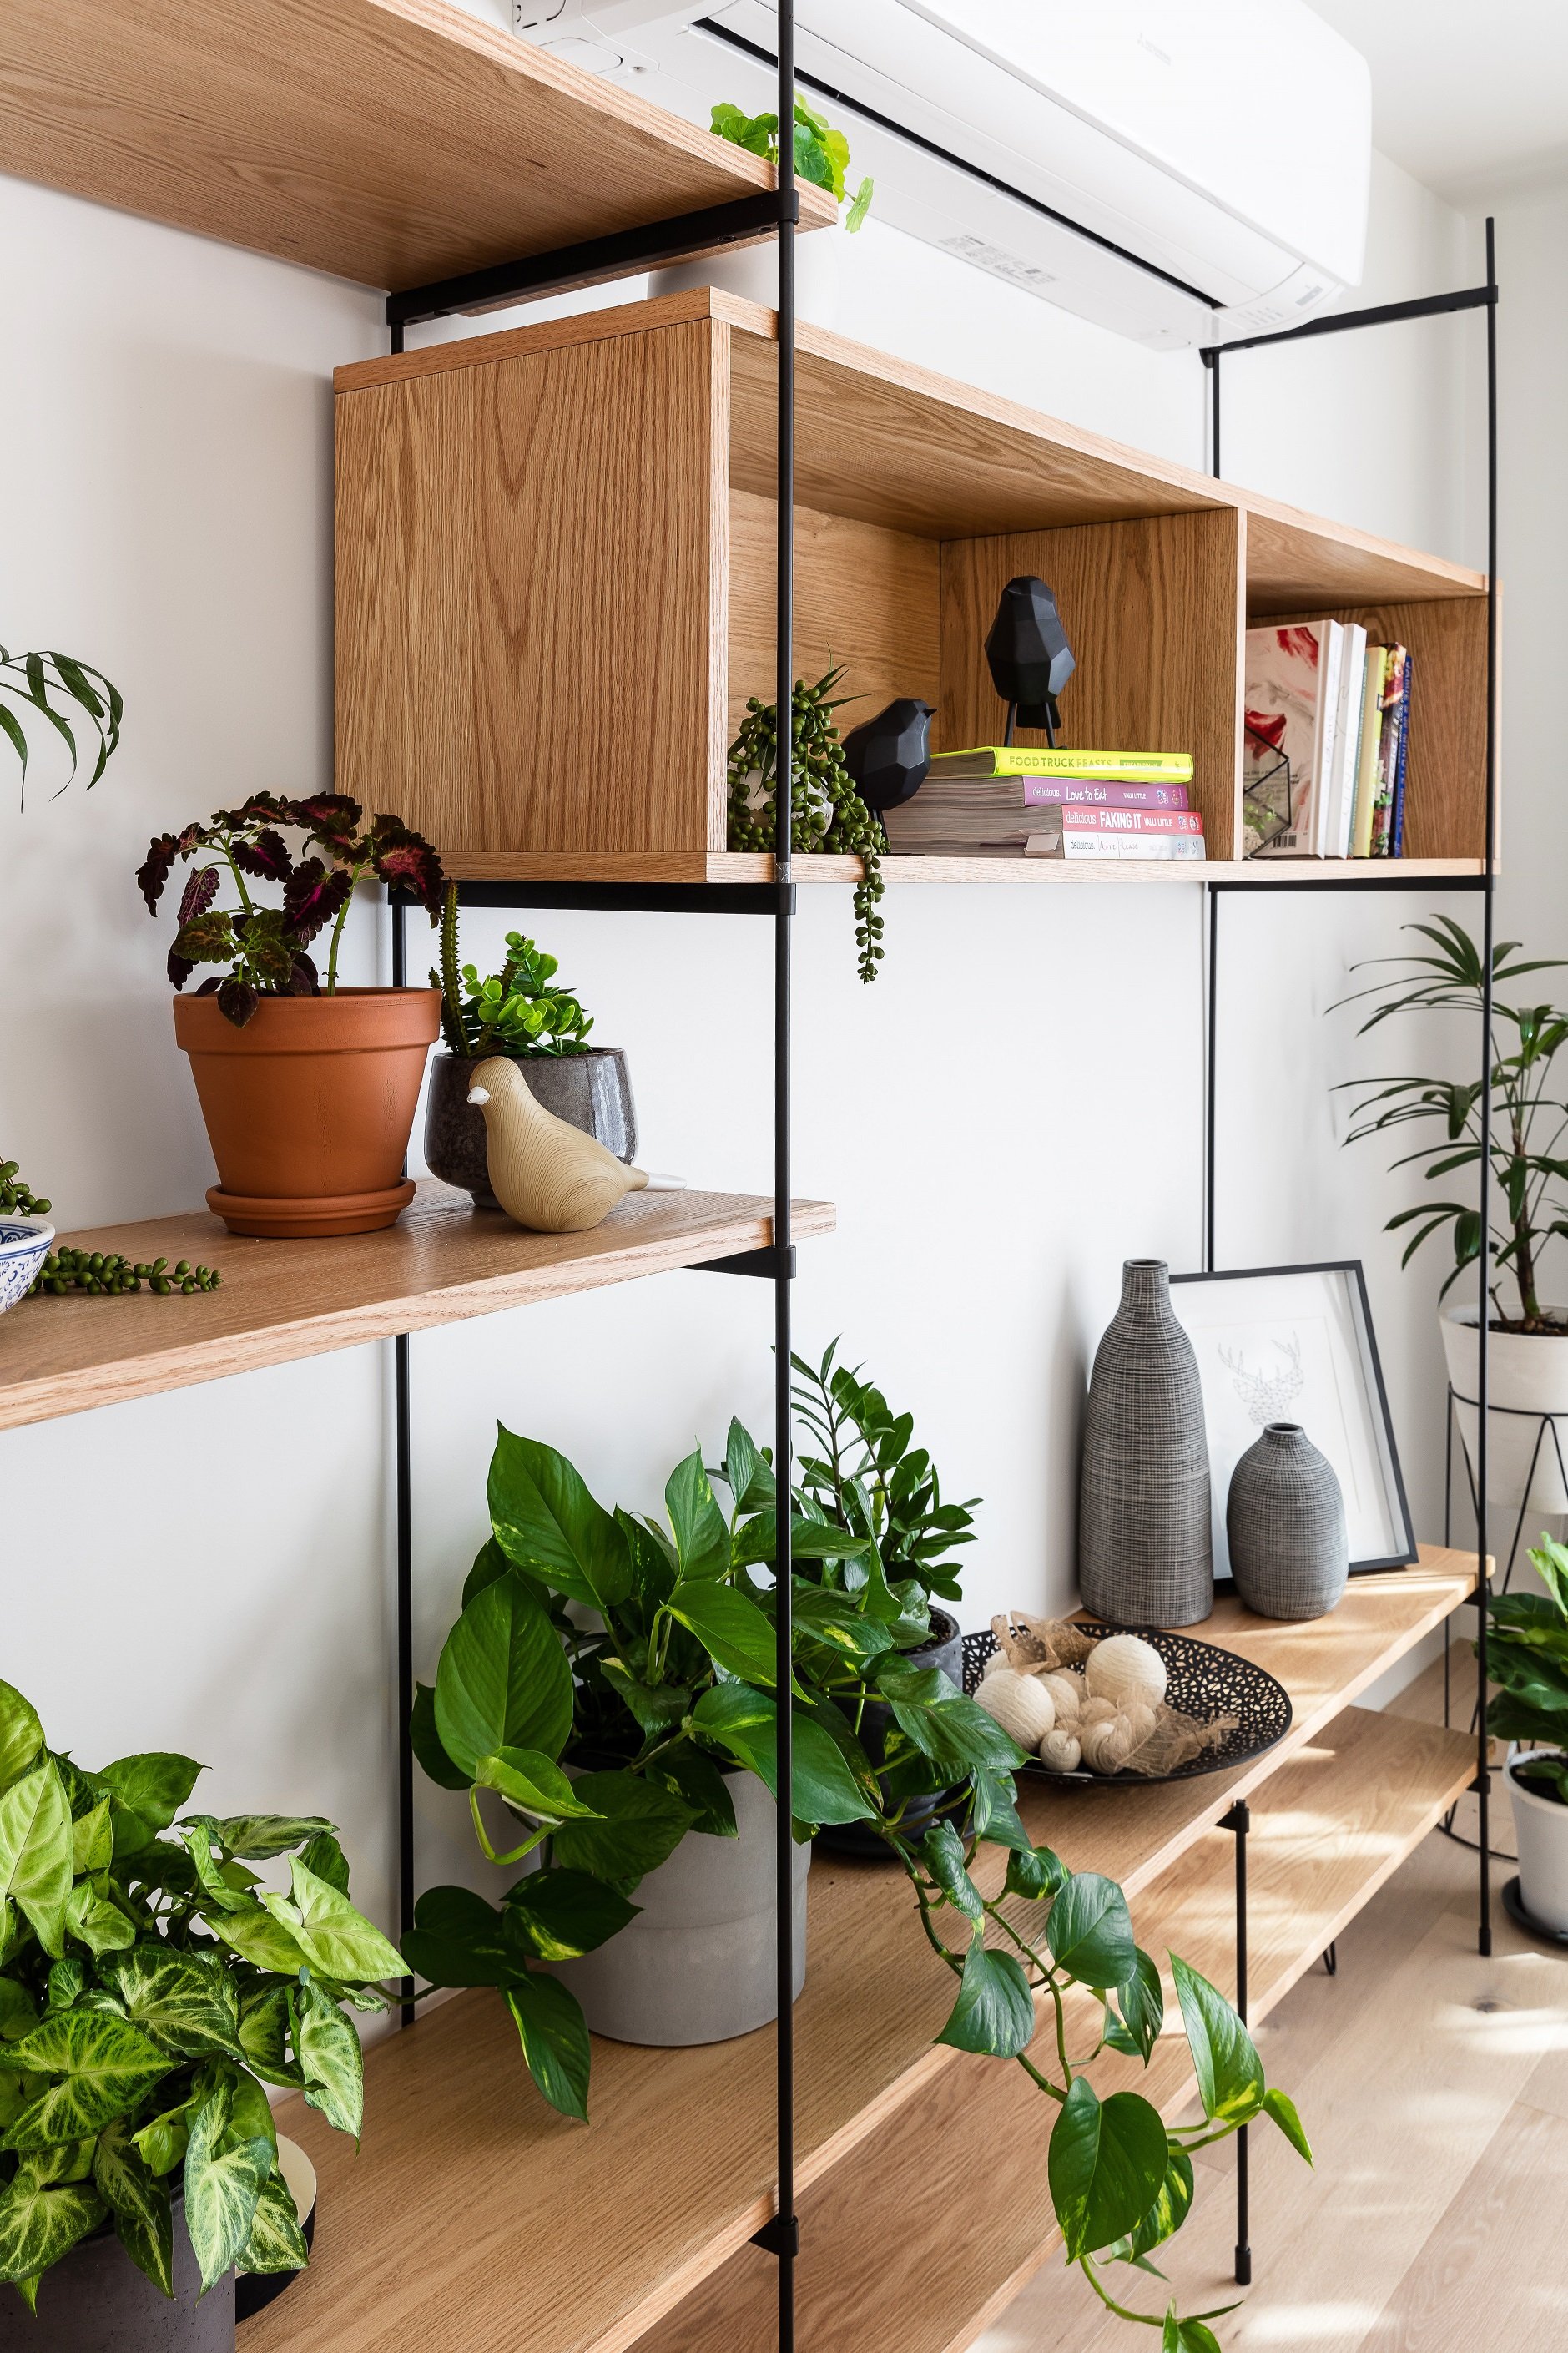
Incorporating whites, neutral timber tones in the floor & furniture to create a sharp contrast with the black aluminum window/door frames, shelving & pendant lights.
Indoor plants would also be added in abundance to give green pockets of color throughout the space. The main highlight of the space was the outlook onto the calming green wall of newly planted bamboo, which we hope will eventually spring up to a height of six to eight meters.

Living room Moodboard
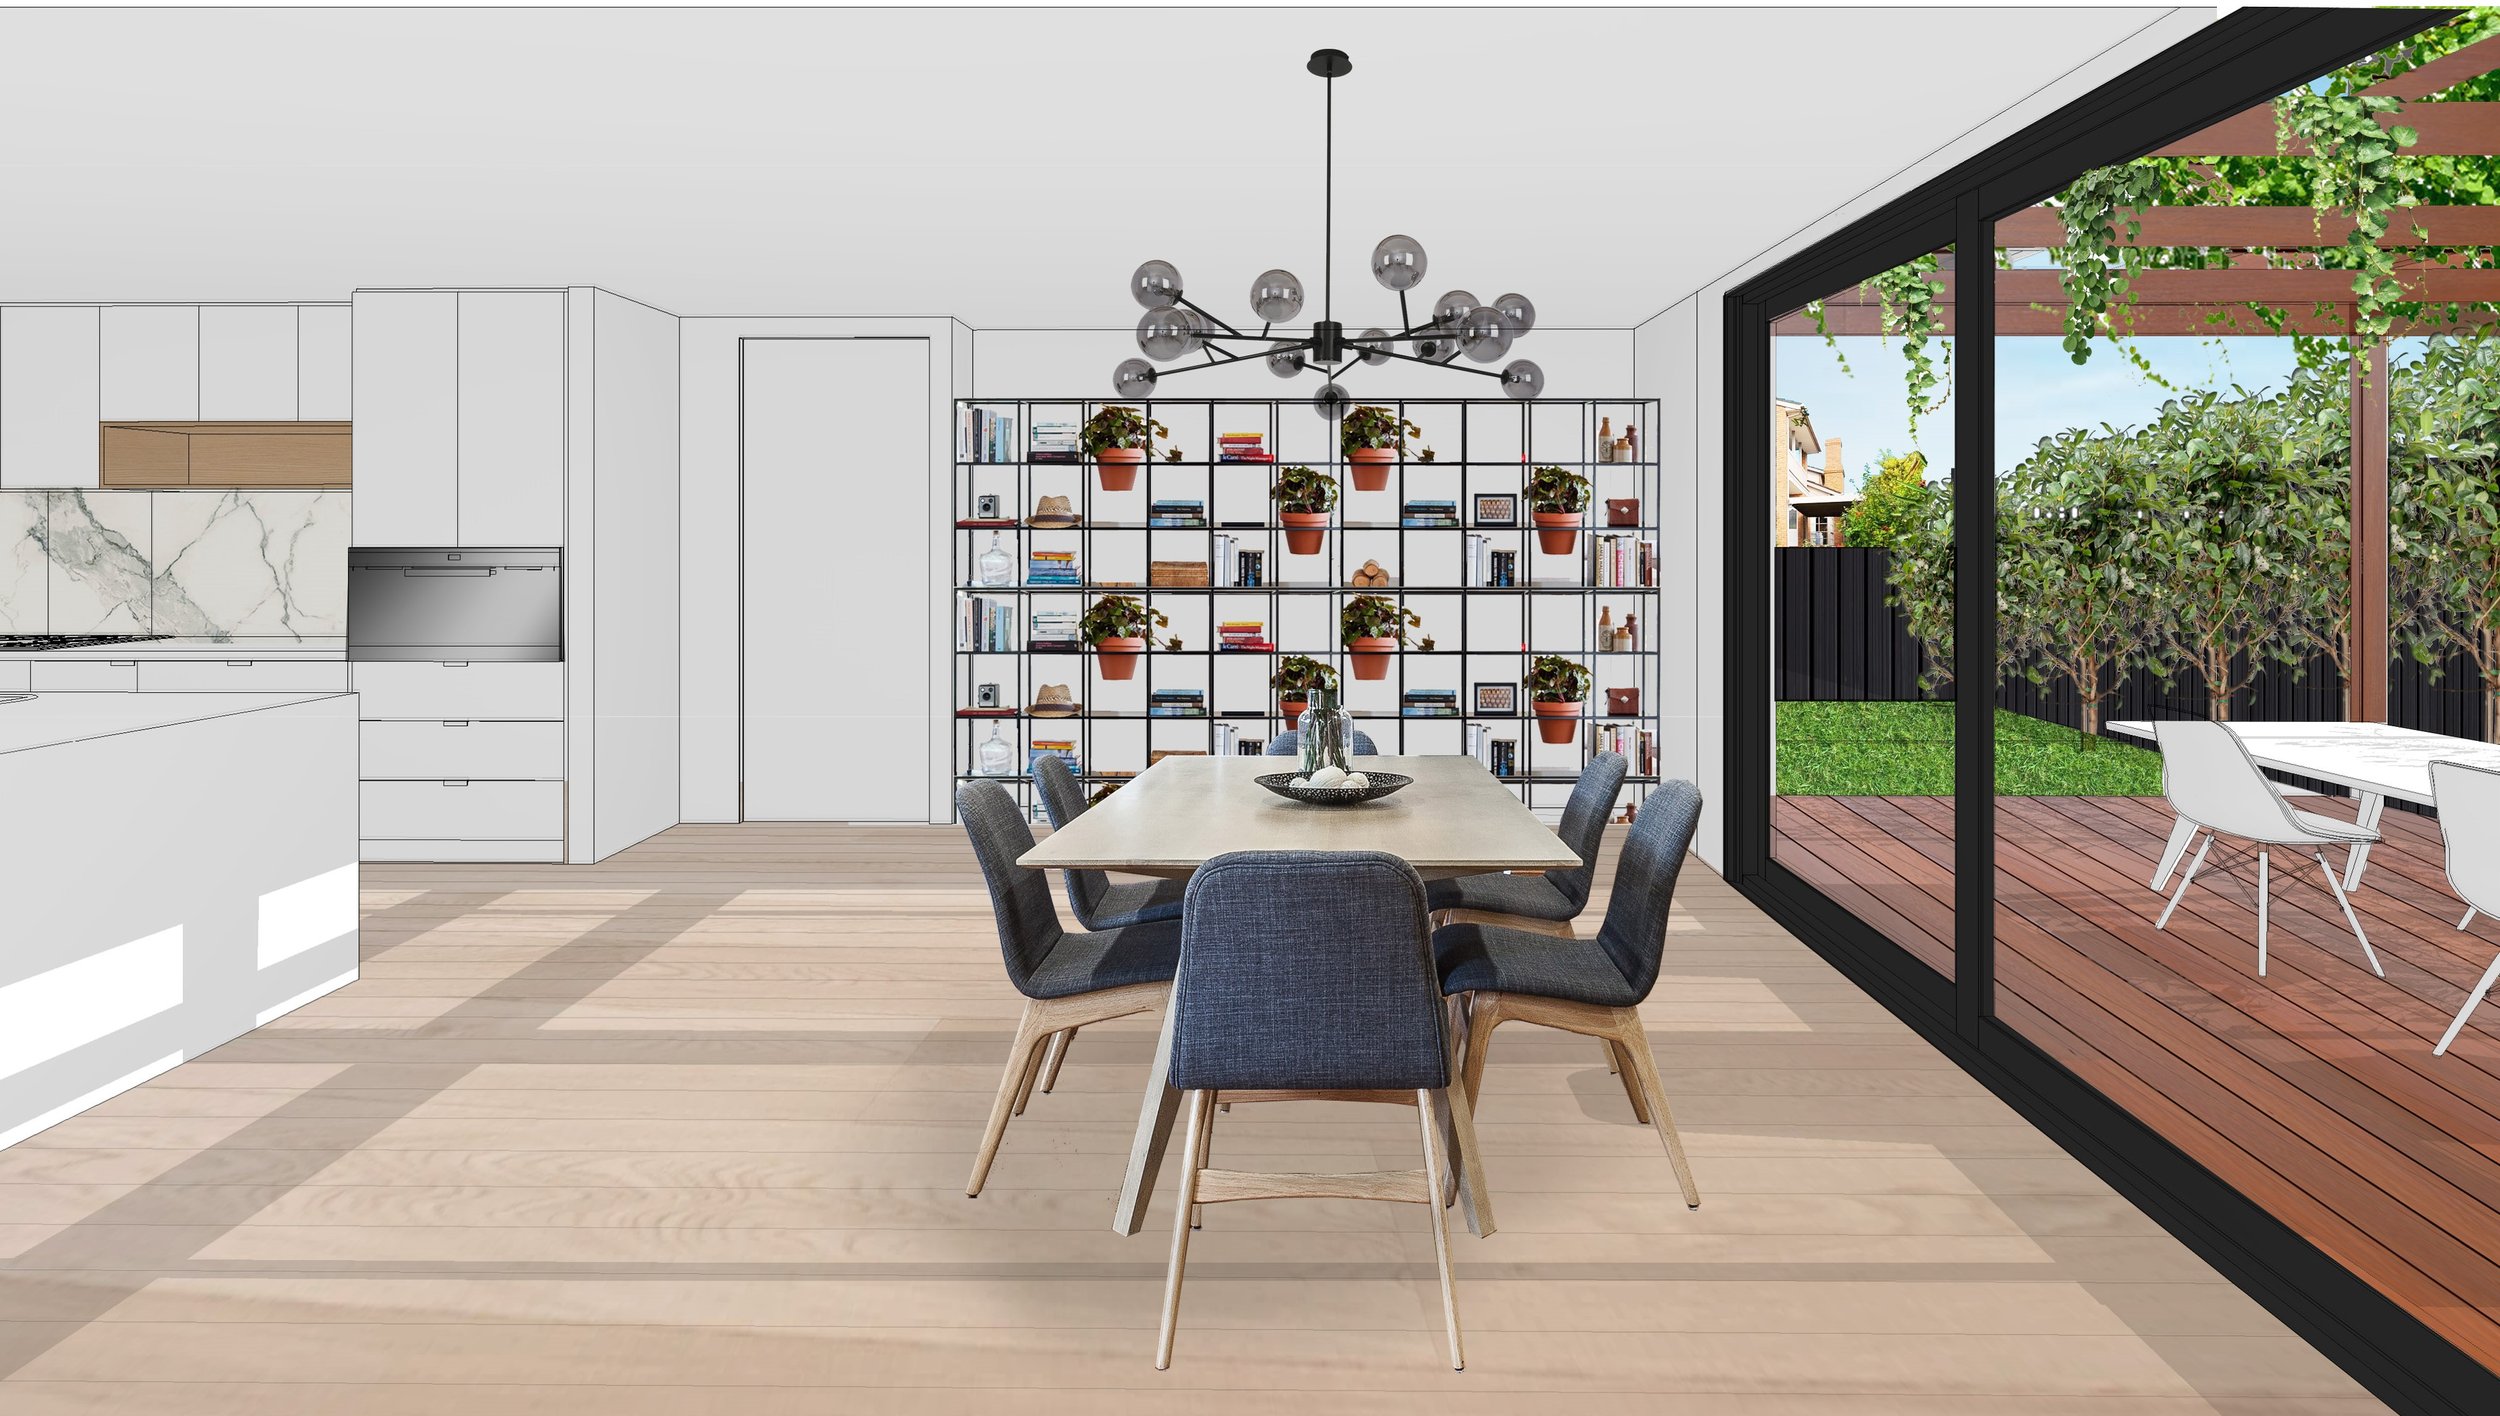
Dining Design 3D Sketch

Post Reno Dining area
Specifications
| Item | Finish | Color/Brand | Design Notes |
|---|---|---|---|
| Walls/Ceiling | Low Sheen Paint | British Paints Star White | A budget choice, British Paints is roughly 30% cheaper then Dulux and Taubmans but still had a good range of whites to choose from |
| Flooring | Engineered Timber Boards | Woodcut Pale Oak | We went with a soft hue timber board so as not to clash or contrast too harshly with the white interior |
| Feature Pendant | LED | Beacon Lighting Orion 15 in Black/Smoke | A moody, modern pendant to fit with the other spherical touches and scheme of the house |
Demolition, Framing & Plasterboard
After having the necessary inspections carried out, we set out opening up the space by removing the two-bedroom walls to the rear. We were fortunate as the roof trusses extended the entire width of the house & none of the internal rear bedroom walls were load bearing.
Most of the existing timber windows were water damaged & beyond saving so we had them all removed & replaced with new aluminum double glazed ones. Many of the undersized windows were swapped out for much larger ones to draw more light in, which meant we had to create larger openings to suit. This involved stripping the walls back to bare bones, knocking out bricks, re-framing studwork, adding lintels and also removing insulation batts & plasterboard to avoid exposure to rain.
Tarpaulin was then fixed to the new wall openings to provide a temporary weather shield until new windows could be re-fitted & brickwork filled in. While all of the internal walls were exposed, we decided to swap out the old wall insulation batts with much higher grade rockwool to improve the homes sound & energy rating.
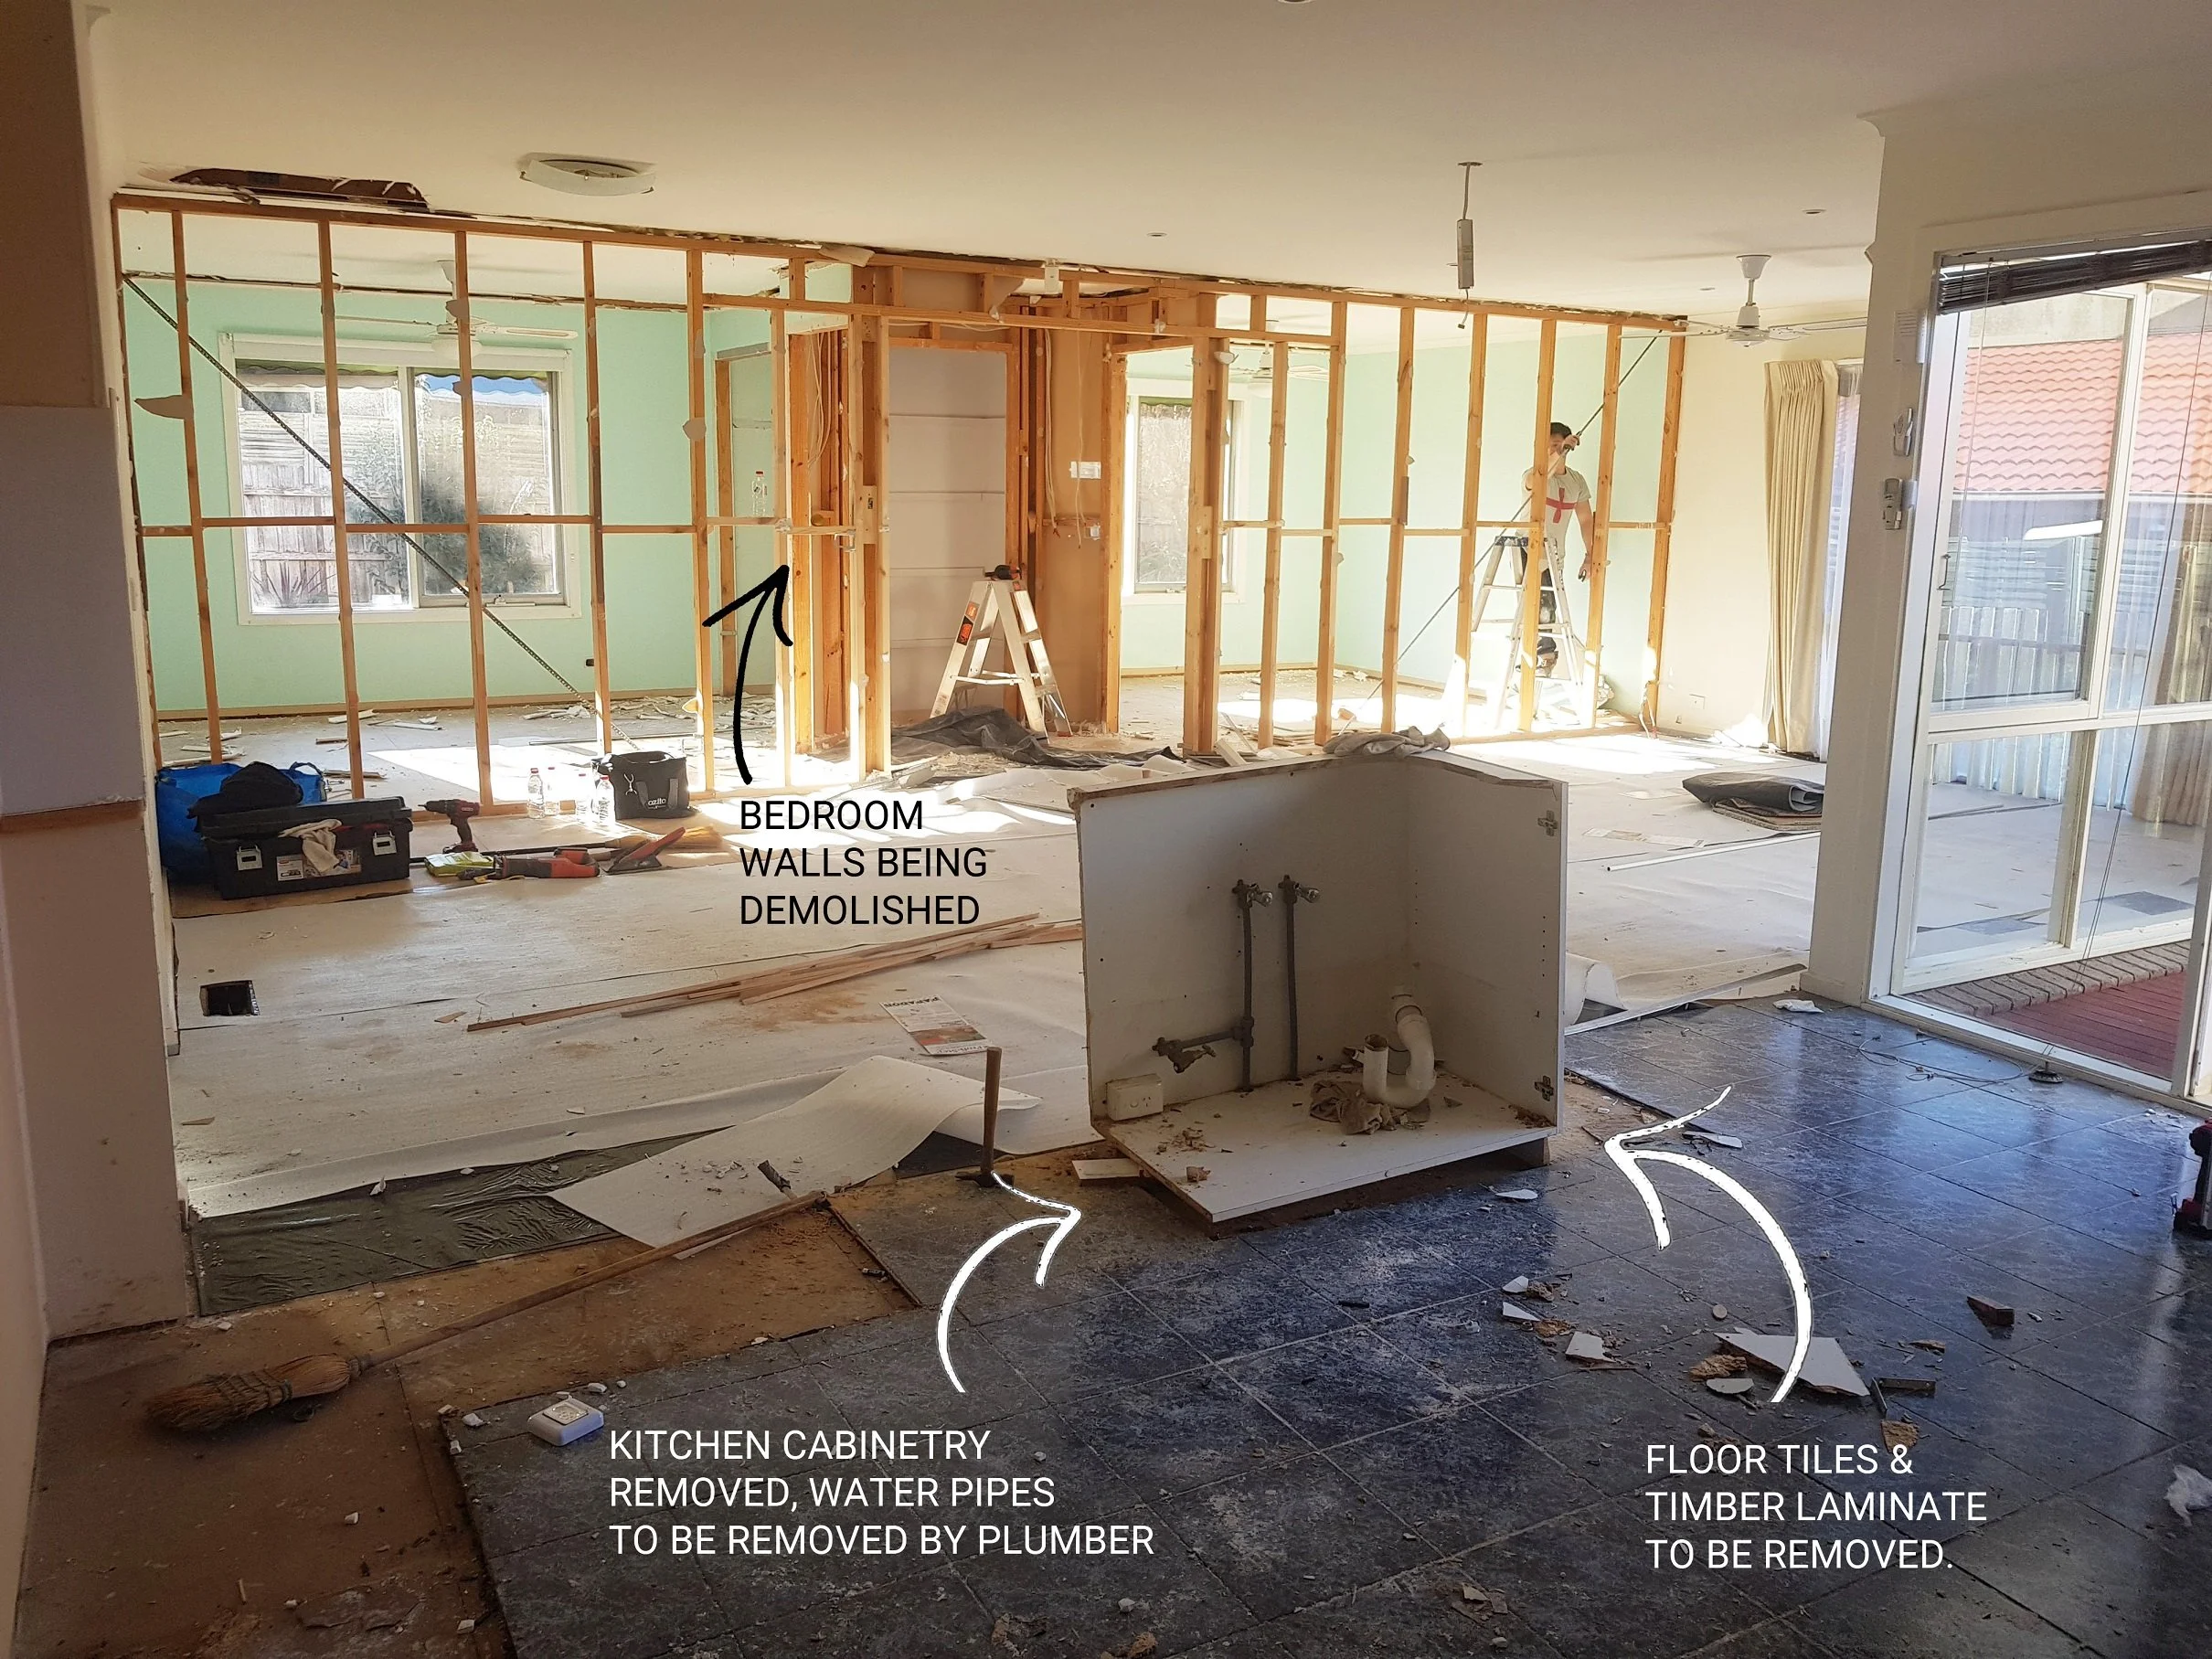
During Reno - Demolition of existing bedrooms
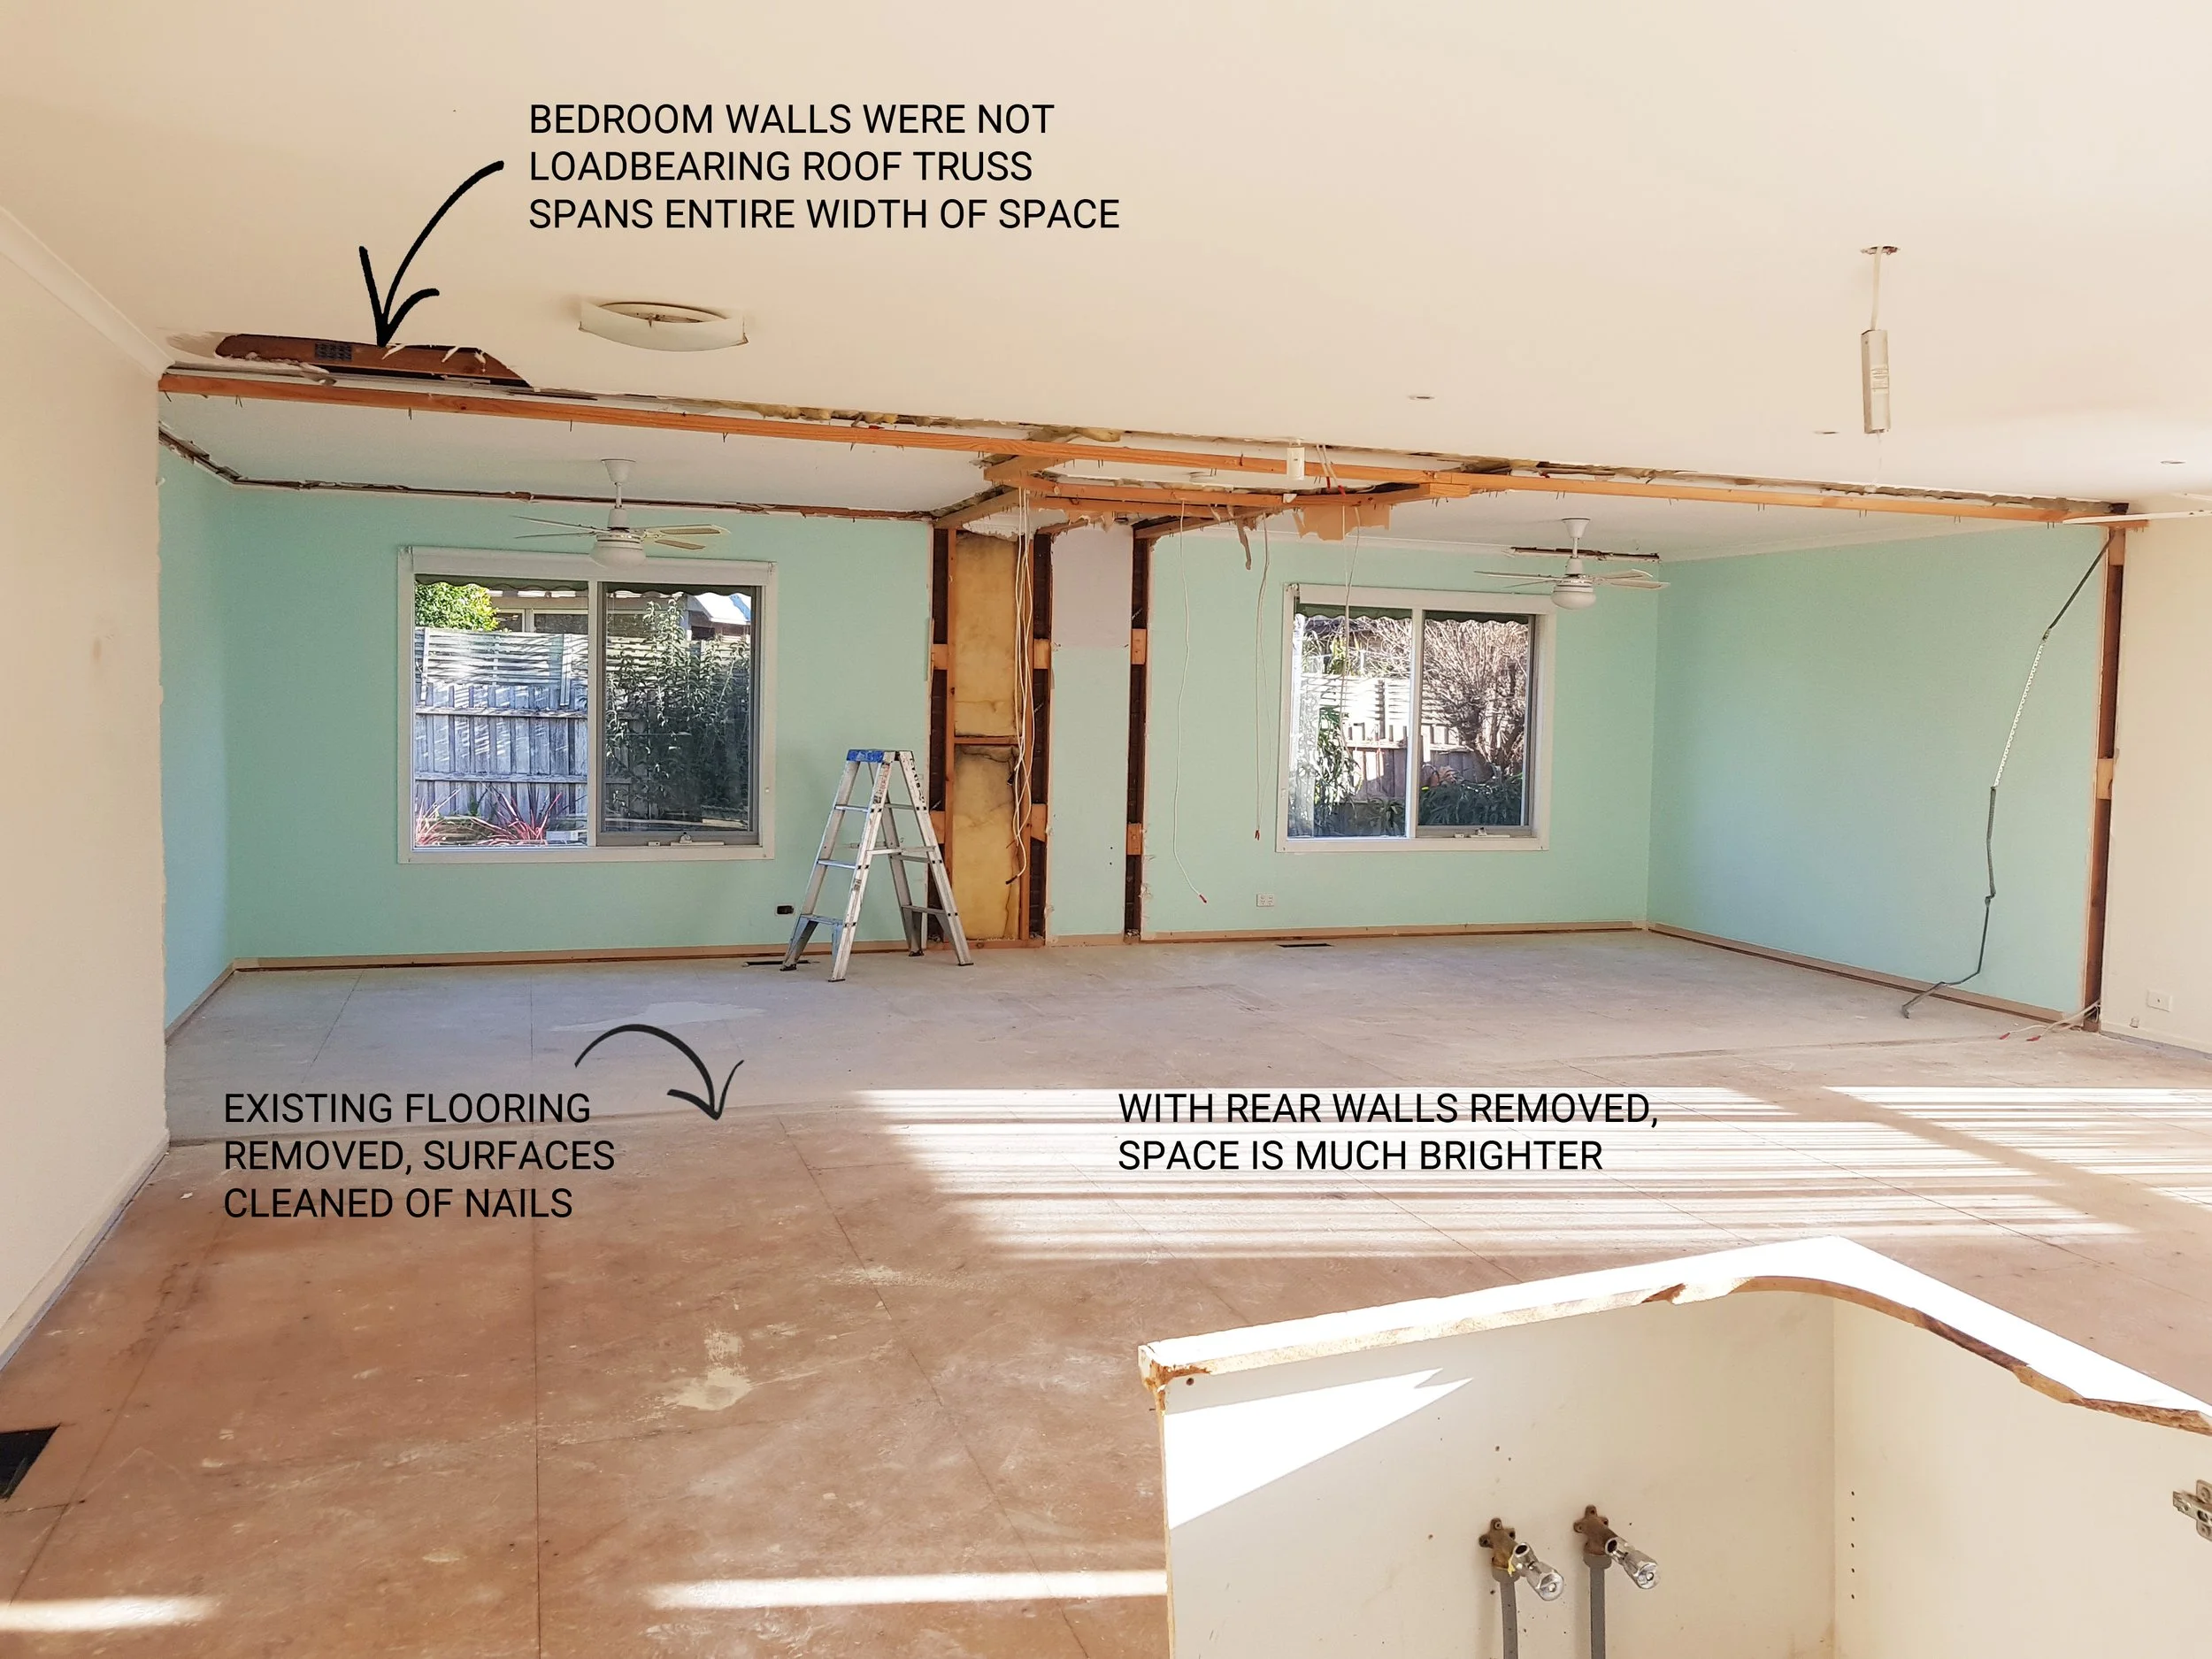
During Reno - Rear space opened up
Painting, Joinery & Flooring
After all the new windows & doors had been installed, we were able to fill in the external brickwork, plasterboard all internal walls, fit skirting boards & architraves. Once the building had been completely sealed inside and out, we had the engineered timber floorboards laid & quickly covered up with layers of plastic & cardboard sheets to protect them from paint & being damaged.
We opted for a commercial grade spray gun to paint the walls & ceilings ourselves to save on time and money, comparatively we spent 90% of our time preparing the space & only 10% on the actual painting.

During Reno - Plasterboard installed, flooring down.
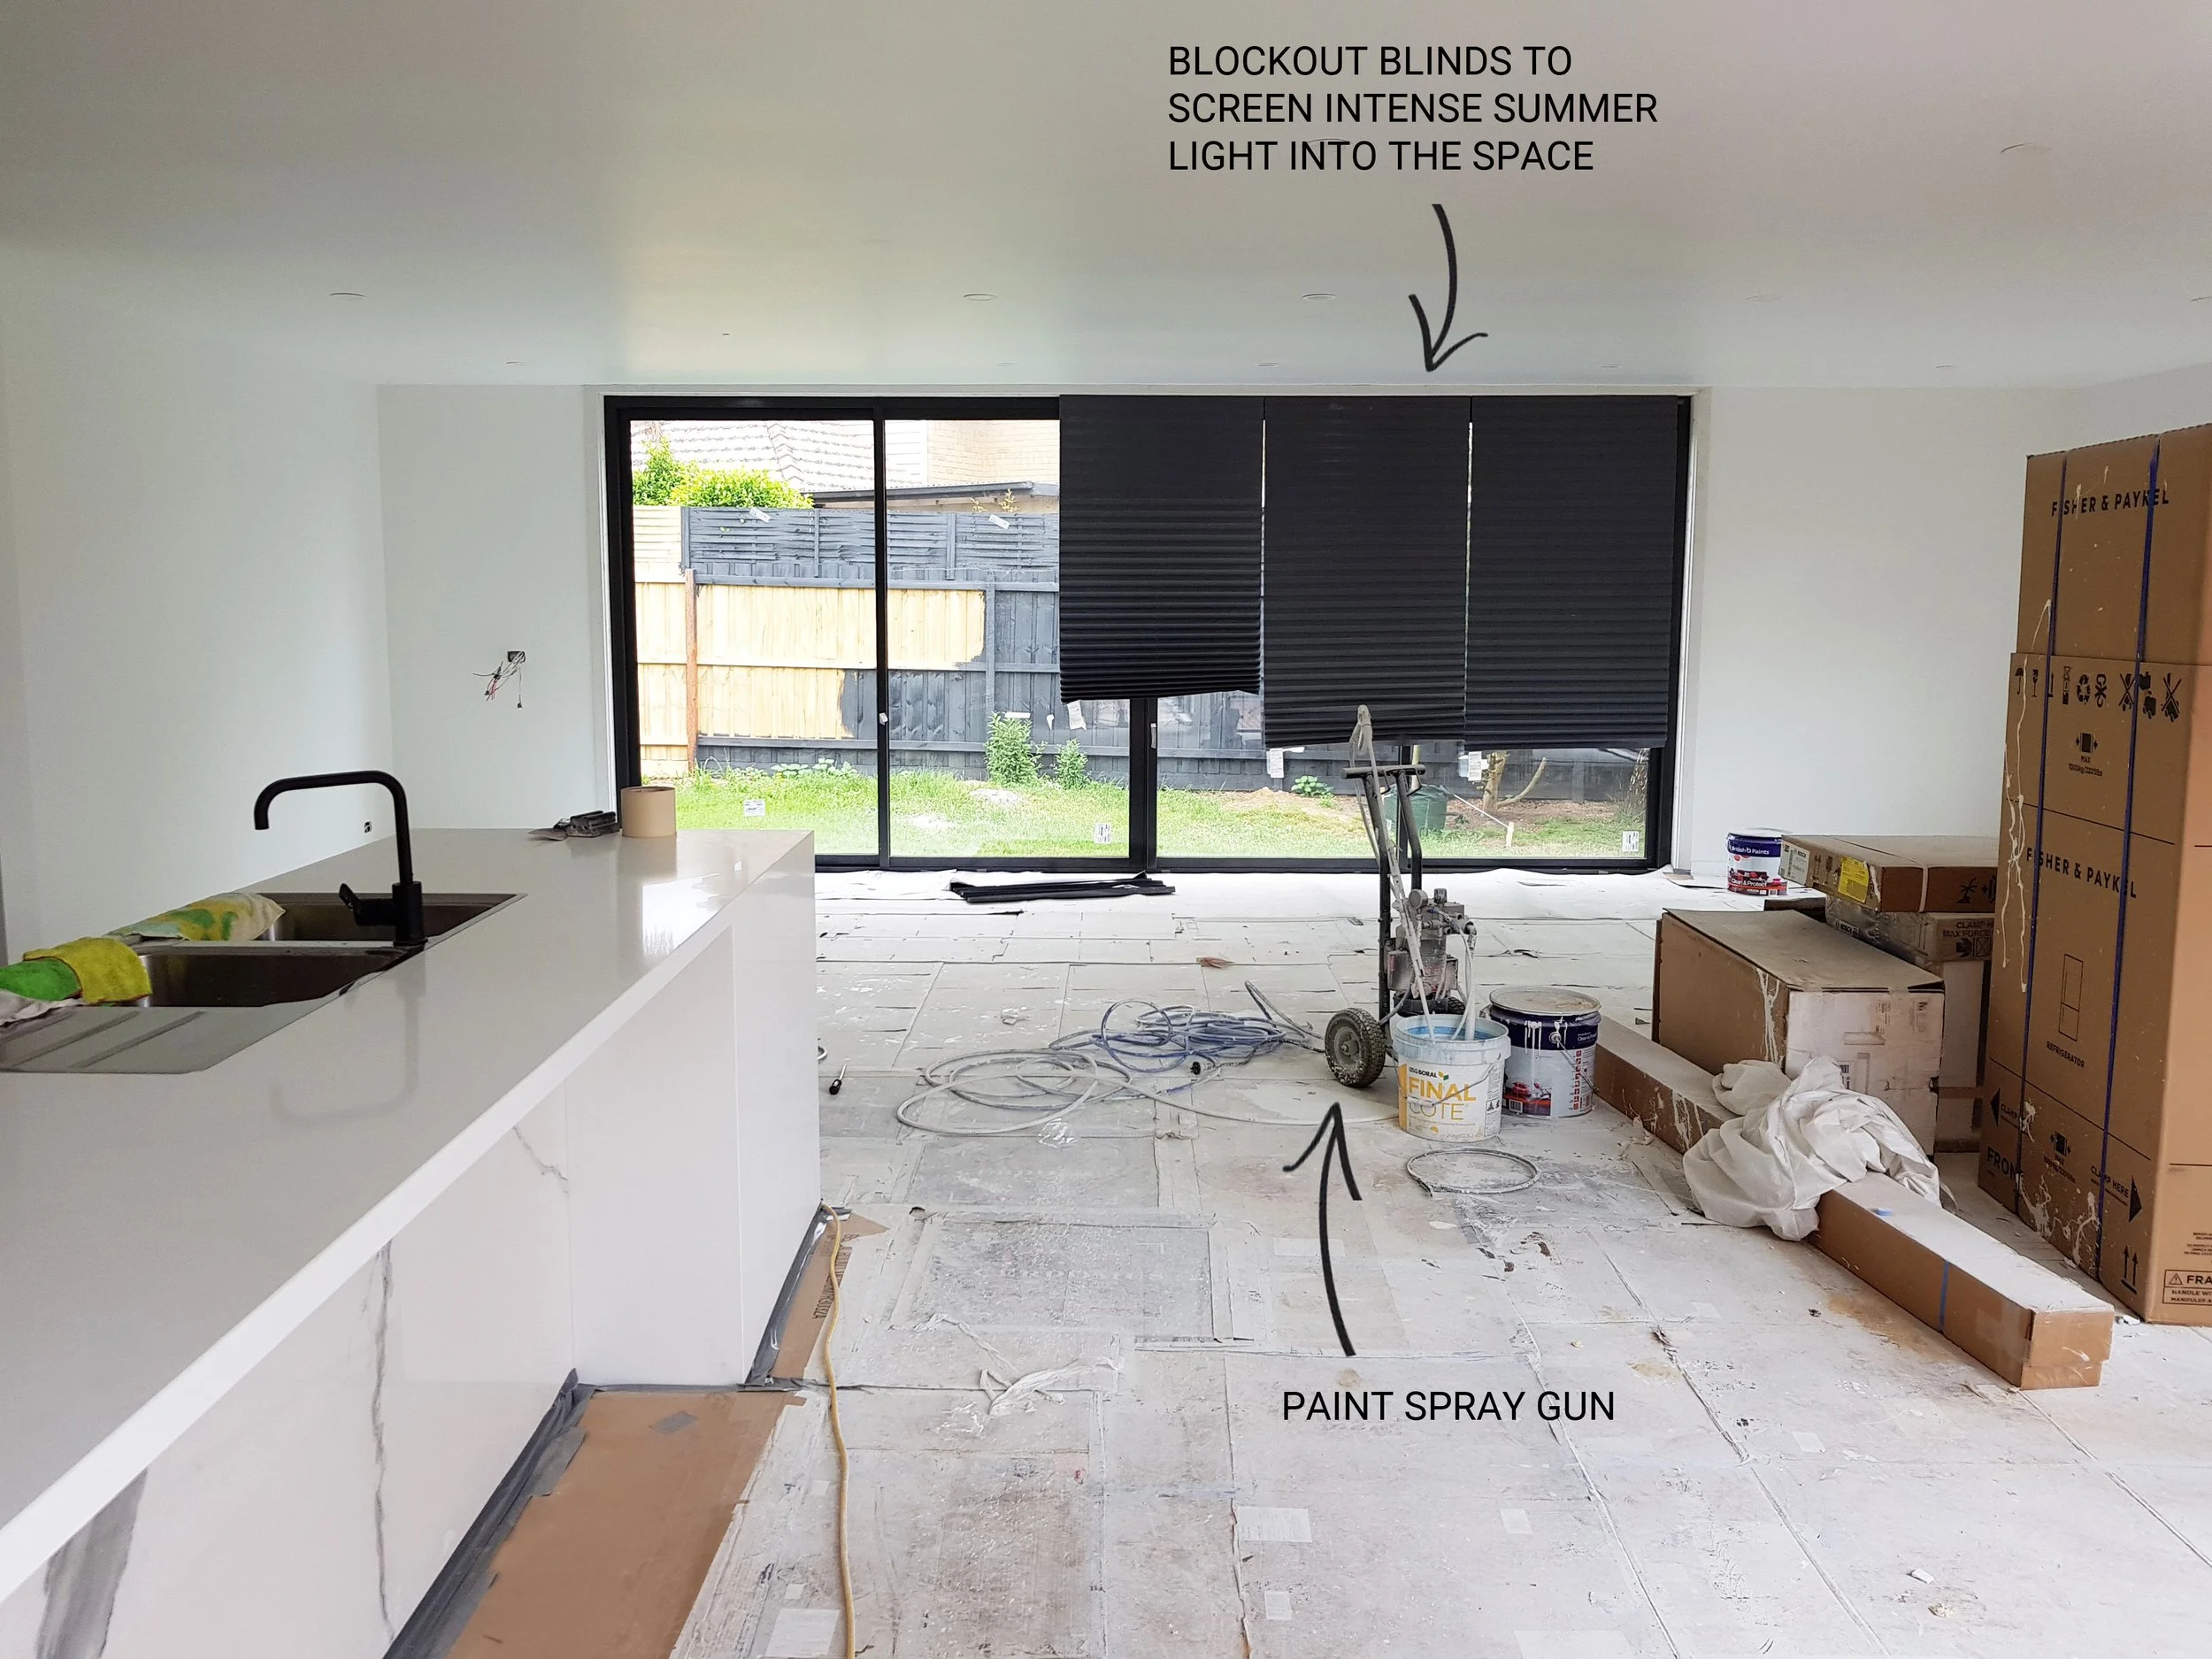
During Reno - First coat of paint & temporary blinds fixed to block out direct summer heat
Costs
| Item | Cost |
|---|---|
| Curtains - Sheer(Supply and Install) | $1,540 |
| Curtains - Block out(Supply and Install) | $1,900 |
| Pendant (Supply Only) | $710 |
| Dining Shelf | $1,200 |
| Dining Table | $990 |
| Sofa | $5,500 |
Get the Look (Click on the links)
Walls, Ceiling Paint: BRITISH PAINTS “STAR WHITE”
Floors: WOODCUT “PALE OAK”
Armchair: FOCUS ON FURNITURE NOOSA “OPTICAL”
Joinery: WOODTEC
Sofa: KING LIVING JASPER
Curtains: ISEEKBLINDS WEYLANDS “TRANQUIL” BLOCKOUT
Windows: ACCENT WINDOWS
Pendant Light: BEACON LIGHTING ORION 15 IN BLACK/SMOKE
Wire Frame Shelf: FREEDOM FLEX

Dream Home Design
Our full design & guided permitting services for single homes delve deep into the lifestyle values behind the checklist. Ditch the project overwhelm and let us improve the wellbeing and quality of life of your family with designs that align with your true needs
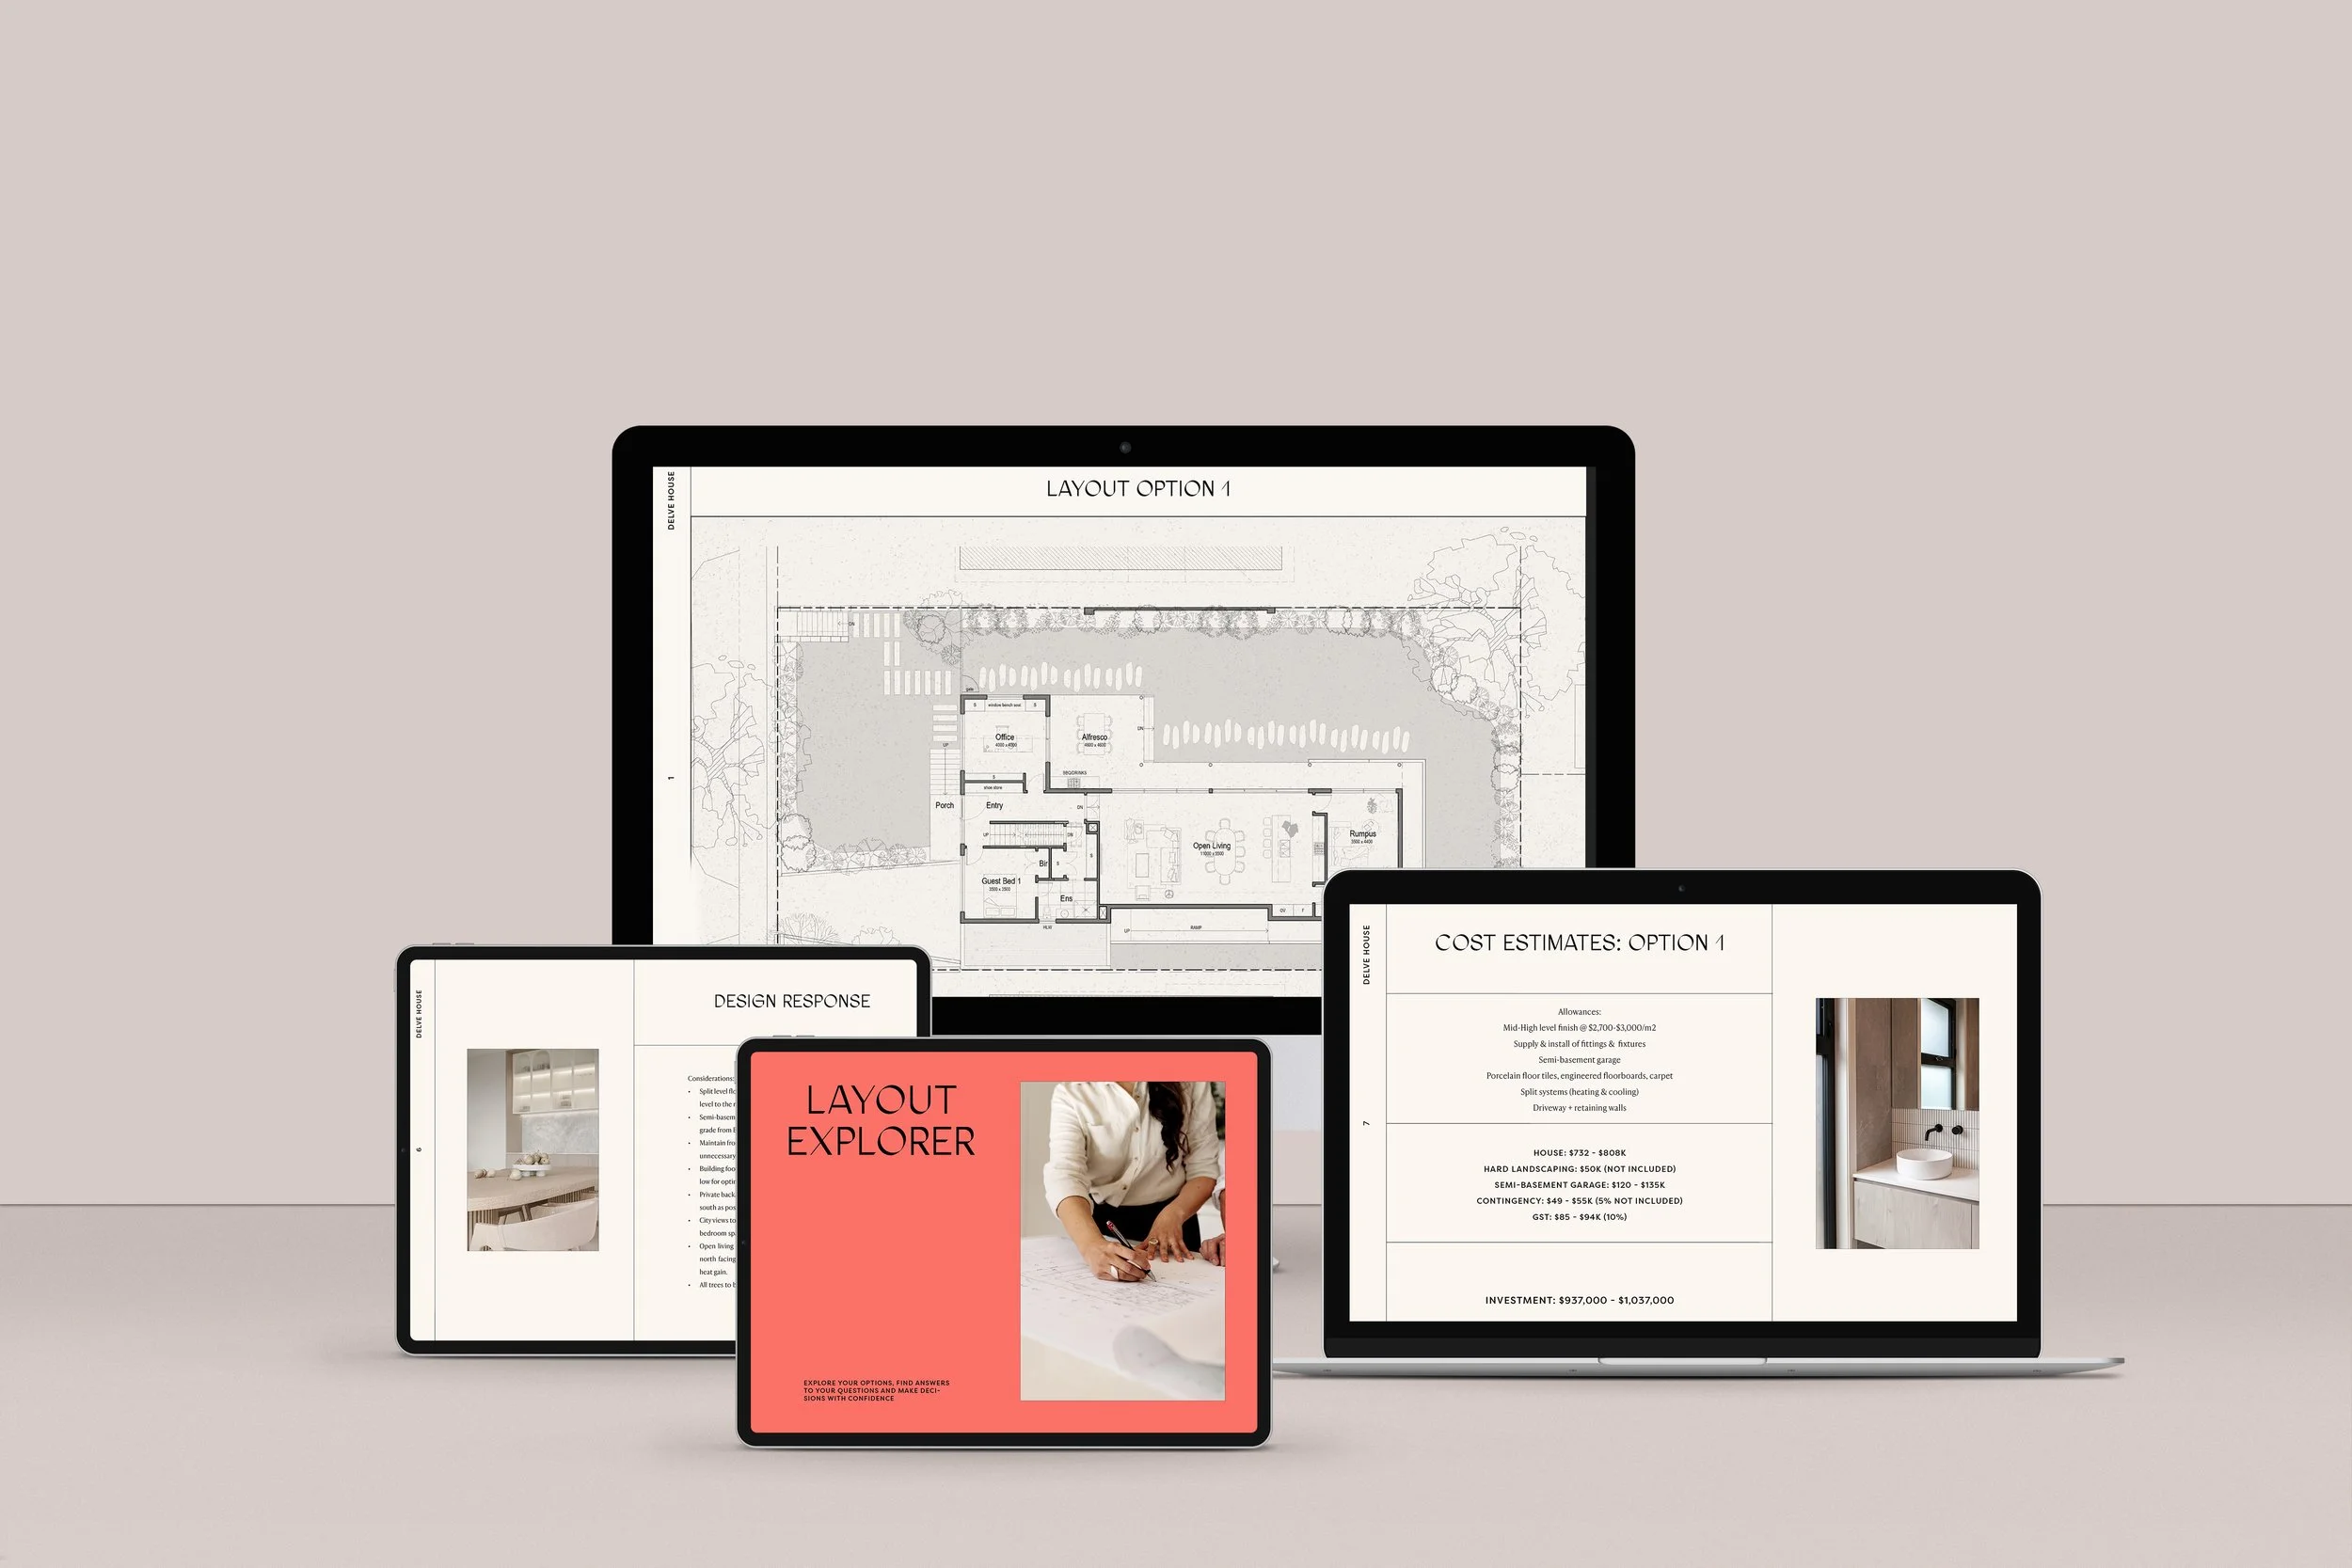
Layout Explorer
Feeling uncertain about starting your new home project? Don’t want to commit to tens of thousands in fees without some initial advice and guidance? Or not sure you want to commit to a project at all because of cost uncertainty?
Our low investment Layout Explorer Package will cut through the fluff, equipping you with what you need to make an informed decision and move forward with confidence.