
Kitchen Overhaul
Case Study: Rowville Reno - kitchen

Kitchens: Heart of the home and the starting point for our Rowville Reno Case Study series
Following on from last week’s intro to our private renovation project, today we will be tackling the kitchen. The original kitchen was from the 1980’s & had never been updated, it was a little worse for wear: benches were too far apart and it was overall lacking in preparation space and storage. The peeling laminate splashback and benchtops were reminiscent of good times past and encouraged us to embark on a complete overhaul.
We wanted the new kitchen to sit centrally within the home, to be part of the large & bright open plan space where we would spend most of our family time.
Outside of our personal brief, we had to ensure the kitchen was future-proof, therefore it was important the design, layout and finishes were neutral and unoffensive. This would increase the chances of the home appealing to a wide pool of buyers when we eventually move on.

Pre reno - Existing kitchen

Post reno - Updated kitchen


CLICK BELOW TO OUR ROOM BY ROOM POSTS FOR BEFORE & AFTER SHOTS
Layout
The major challenge was re-configuring the outdated kitchen plan into one that would work for our modern lifestyle. We started by shifting the kitchen towards the back of the house to free up space for an extra powder in the hallway & walk-in-robe to the new Bedroom 3 (previously formal dining). We’d also considered a butler’s pantry instead of the powder & walk-in robe, but decided the kitchen itself would house enough storage for our needs.
Secondly, we separated the kitchen from the third bedroom, bath & laundry by adding a corridor, this would reduce noise interference to the bedroom & prevent odours from the toilet traveling to the dining & food preparation area.

Pre Reno - Existing plan of kitchen & living

Post Reno - Proposed plan of kitchen & living
Design, Finishes & Specifications
Before embarking on any design, we always start with a moodboard which acts as an anchor to the design style we are looking to achieve aswell as combination of finishes/materials and textures. You can start your own moodboard by collecting relevant images and amassing them on a single easy to read page.
Our brief for the design of the kitchen was to have an open, inclusive island bench and plenty of full height cupboard storage as we were not including a butlers pantry. White, minimalist, flush cabinetry with a subtle marble texture splashback would create a soft contrast with a neutral timber floor and feature shelf.

Proposed Kitchen Moodboard

Kitchen Design 3D Sketch
Specifications
| Item | Finish | Color/Brand | Design Notes |
|---|---|---|---|
| Cabinet Doors | 2pac | Dulux Lexicon Half | We chose 2pac as it is a sprayed finish, making a seamless surface between faces when compared to laminate |
| Wall Shelf | Laminate | Polytec Prime Oak Woodmatt | The warmth of the timber softens the neautral pallette of the white 2pac |
| Cabinet Pulls | Lip Pulls | Brass | Unobtrusive brass lip pulls lend abit of glam to the overall scheme |
| Flooring | Engineered Timber | Woodcut Pale Oak | We went with a soft hue timber board so as not to clash or contrast too harshly with the white interior |
| Splashback | Porcelain | Quantum Quartz QuantumSix+ Statuario | Chosen for its striking marble pattern as a feature to the kitchen, the 6mm porcelain splashback was used sparsely both for effect and budget |
| Benchtops | Quartz Stone | YDL Stone Arctic White | To keep within budget, we chose a more affordable stone range for the benchtops and focused on spashing out on the feature splashback |
| Walls | Low Sheen Paint | British Paints Star White | Another budget choice, British Paints is roughly 30% cheaper then Dulux and Taubmans but still had a good range of whites to choose from |
| Oven | 900mm Wall Oven | Bosch | 900mm wide cabinets meant we could oversize the appliances from the standard 600mm |
| Cooktop | 900mm Induction | Bosch | We were after an induction cooktop from the outset as it is easy to clean and is quick to heat up |
| Rangehood | 900mm Slideout | Bosch | Slideout rangehoods are the most cost effective when compared to other styles. Although not invisible like the undermount rangehood, this one was slimline enough to not detract too much from the cabinetry |
| Dishwasher | 600mm | Westinghouse | We selected a white dishwasher to blend in with the cabinetry and save on the cost of an integrated unit. |
| Sink | SS Double Bowl | Blanco | When choosing a sink, always ensure your base cabinet is wide enough to fit both bowls within it's cavity |
| Tap | Brass Mixer | Caroma Jade Black | A black mixer was selected to tie in with the steel plate leg and marble accents |
| Feature Light | LED Pendant | Beacon Lightin Strix in Black | We went with a minimal strip LED light above the island bench to match the overall design style of the kitchen |
| Island Bench Leg | Powdercoat Steel Plate | Black | The black plate leg breaks up the symmetry of the kitchen and creates a point of interest while taking the load of the benchtop cantilever |
Demolition, Framing & Plasterboard
The new layout had the main kitchen bench backing onto the old dining room wall. This was plastered over and the dining room converted to a bedroom. The existing kitchen cabinetry was completely removed and services disconnected and sealed ready for new pipework and plumbing.
The existing blue tiles and underlying cement sheet were removed and all nails cleaned out. This can often be a costly exercise as the cement sheet underlay is quite nail intensive. Your tile removalist will need to take out all nails in order to have a smooth base for laying new flooring

During Reno - Demolition of existing kitchen cabinetry

During Reno - After removal of floor tiles and cement sheet

During Reno - Studwork up between new kitchen, powder & bedroom 3

During Reno - Plasterboard up to new walls
Painting, Joinery & Flooring
Our cabinetmakers pulled off a speedy production turnaround in order to avoid spilling into the Christmas industry break and delaying the project. If you are getting a custom kitchen done, remember to factor in enough time for your joiner to produce and install your cabinets so as not to delay your other trades. Also take into account the stonemason and time required to measure, order and cut your benchtops before installation.
Movement in the stumps over the years had caused dips and bows in certain areas of the kitchen and living area. As this was the largest area of new floorboards to be laid, the floor joists needed to be leveled. This prevented “squishy” or squeaky floorboards once installed.
To make up on the additional spend on floor leveling, we borrowed a paint sprayer and did the painting ourselves. With a spray gun this is much easier especially if the walls and ceiling are done in the same color.

During Reno - Base cabinetry installed and stone/porcelain in

During Reno - Finishing off cabinetry doors
Costs
As with any project, design ideas and features have changed and been updated during the construction stage to fit within the constraints of budget.
We have made many budget conscious decisions and cut out more than a few fancy design ideas along the way. Below is a table of some of the item costs specific to this kitchen. If you are interested in overall trade and material costs, we will be including an overall costs table in our final post of this series.
| Item | Cost |
|---|---|
| Stone (Supply & Install) | $6,200 |
| Porcelain (Supply & Install) | $2,750 |
| Steel Plate Leg (Supply Only) | $450 |
| Cabinetry (Supply & Install) | $16,000 |
| Cabinet Handles | $250 |
| Cooktop | $1,585 |
| Oven | $1,950 |
| Rangehood | $730 |
| Fridge | $1,275 |
| Sink | $420 |
| Mixer | $230 |
| Dishwasher | $700 |
| Pendant Light | $400 |
Get the Look (Click on the links)
Walls/Ceiling Paint: BRITISH PAINTS “STAR WHITE”
Floors: WOODCUT “PALE OAK”
Kitchen Cabinetry: WOODTEC
Benchtops/Waterfall: YDL STONE “ARCTIC WHITE”
Splashback/Island Backing: QUANTUM QUARTZ “STATUARIO SIX+”
Pendant Light: BEACON LIGHTING “LEDLUX STRIX LED”
Stools: FREEDOM “MARCO BAR STOOL”
Oven: BOSCH 900mm SERIE 6 OVEN
Cooktop: BOSCH 900mm SERIE 8 INDUCTION COOKTOP
Dishwasher: WESTINGHOUSE 60cm WHITE FREESTANDING DISHWASHER
Rangehood: BOSCH 900mm SERIE 4 SLIDEOUT RANGEHOOD
Sink: BLANCO LEMIS DOUBLE BOWL SINK
Mixer: CAROMA JADE BLACK SINK MIXER
Cabinet Handles: KETHY “FORNEL” BRASS LIP PULLS
That’s a wrap on the kitchen!
Stay tuned next week for our post on the home office.
In the meantime, get in touch if you have any questions regarding your own project below.

Dream Home Design
Our full design & guided permitting services for single homes delve deep into the lifestyle values behind the checklist. Ditch the project overwhelm and let us improve the wellbeing and quality of life of your family with designs that align with your true needs
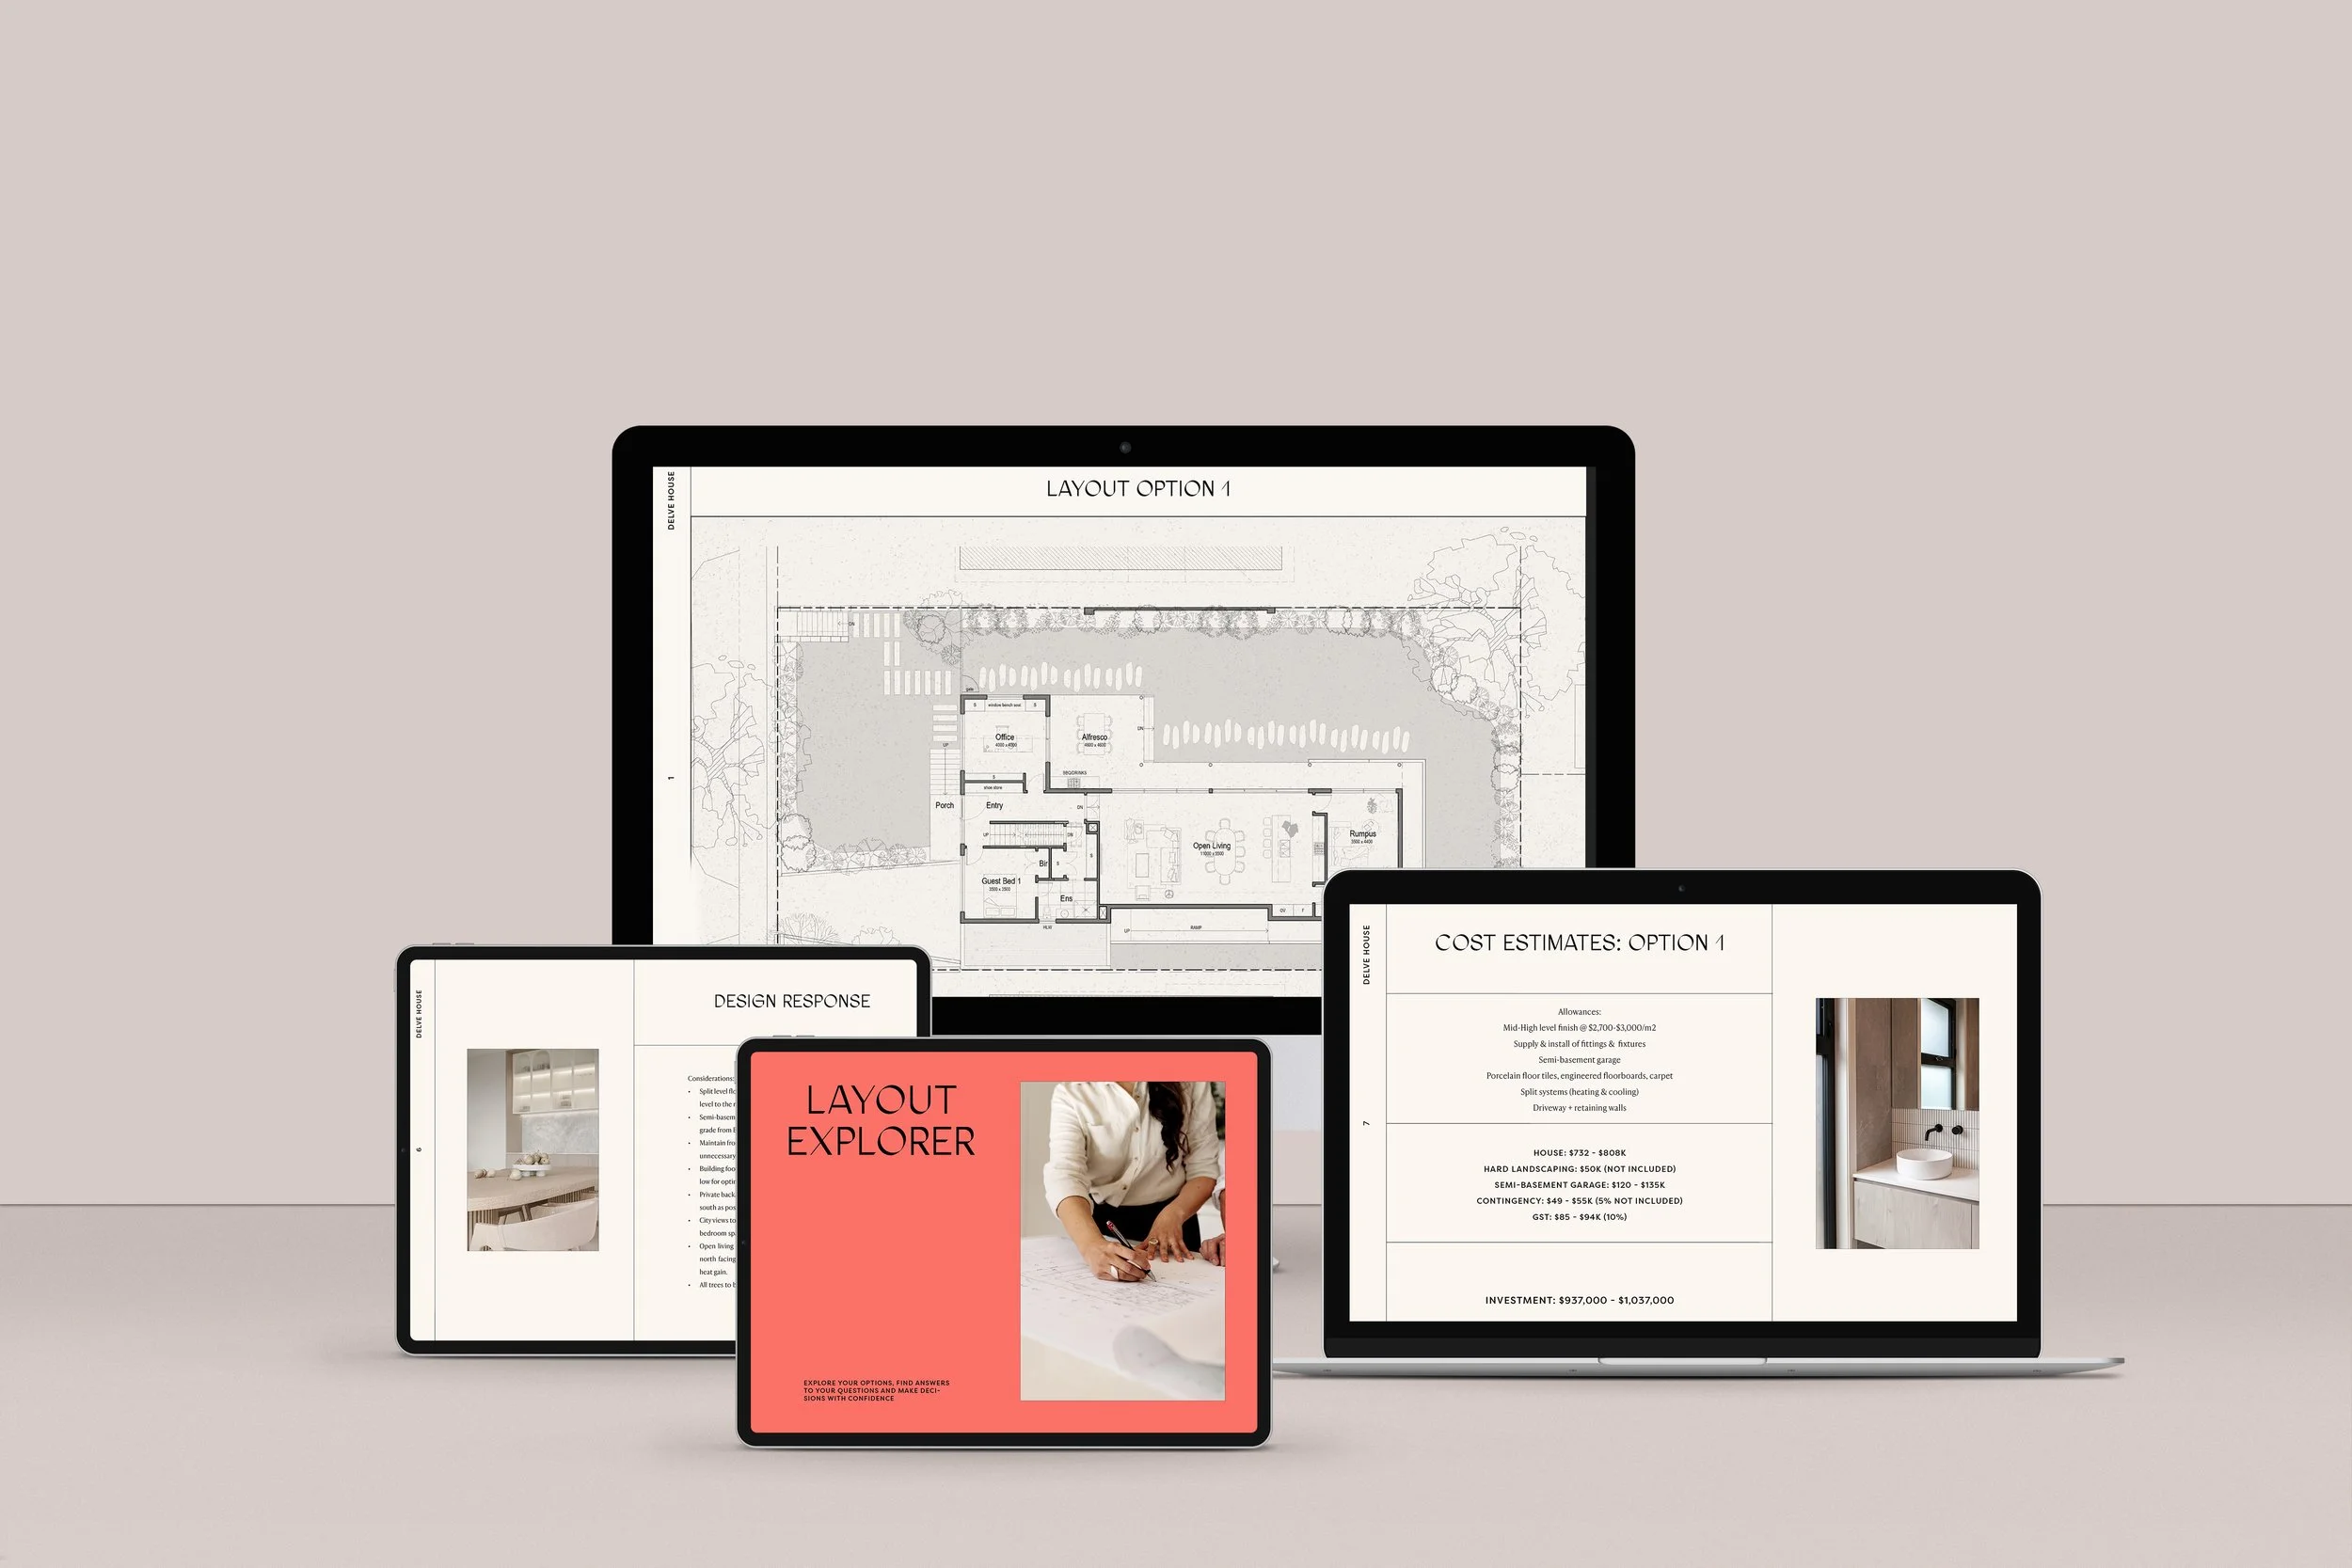
Layout Explorer
Feeling uncertain about starting your new home project? Don’t want to commit to tens of thousands in fees without some initial advice and guidance? Or not sure you want to commit to a project at all because of cost uncertainty?
Our low investment Layout Explorer Package will cut through the fluff, equipping you with what you need to make an informed decision and move forward with confidence.